
AI Workflow, Interactivity, Case Study
Building Generative AI Powered Plotter
December 18, 2025
Learn more about SAIAR and sign up for our newsletter.
Join our community on slack to receive the latest information, share workflows and connect with like-minded creatives.
Portrait-Plotter V.0
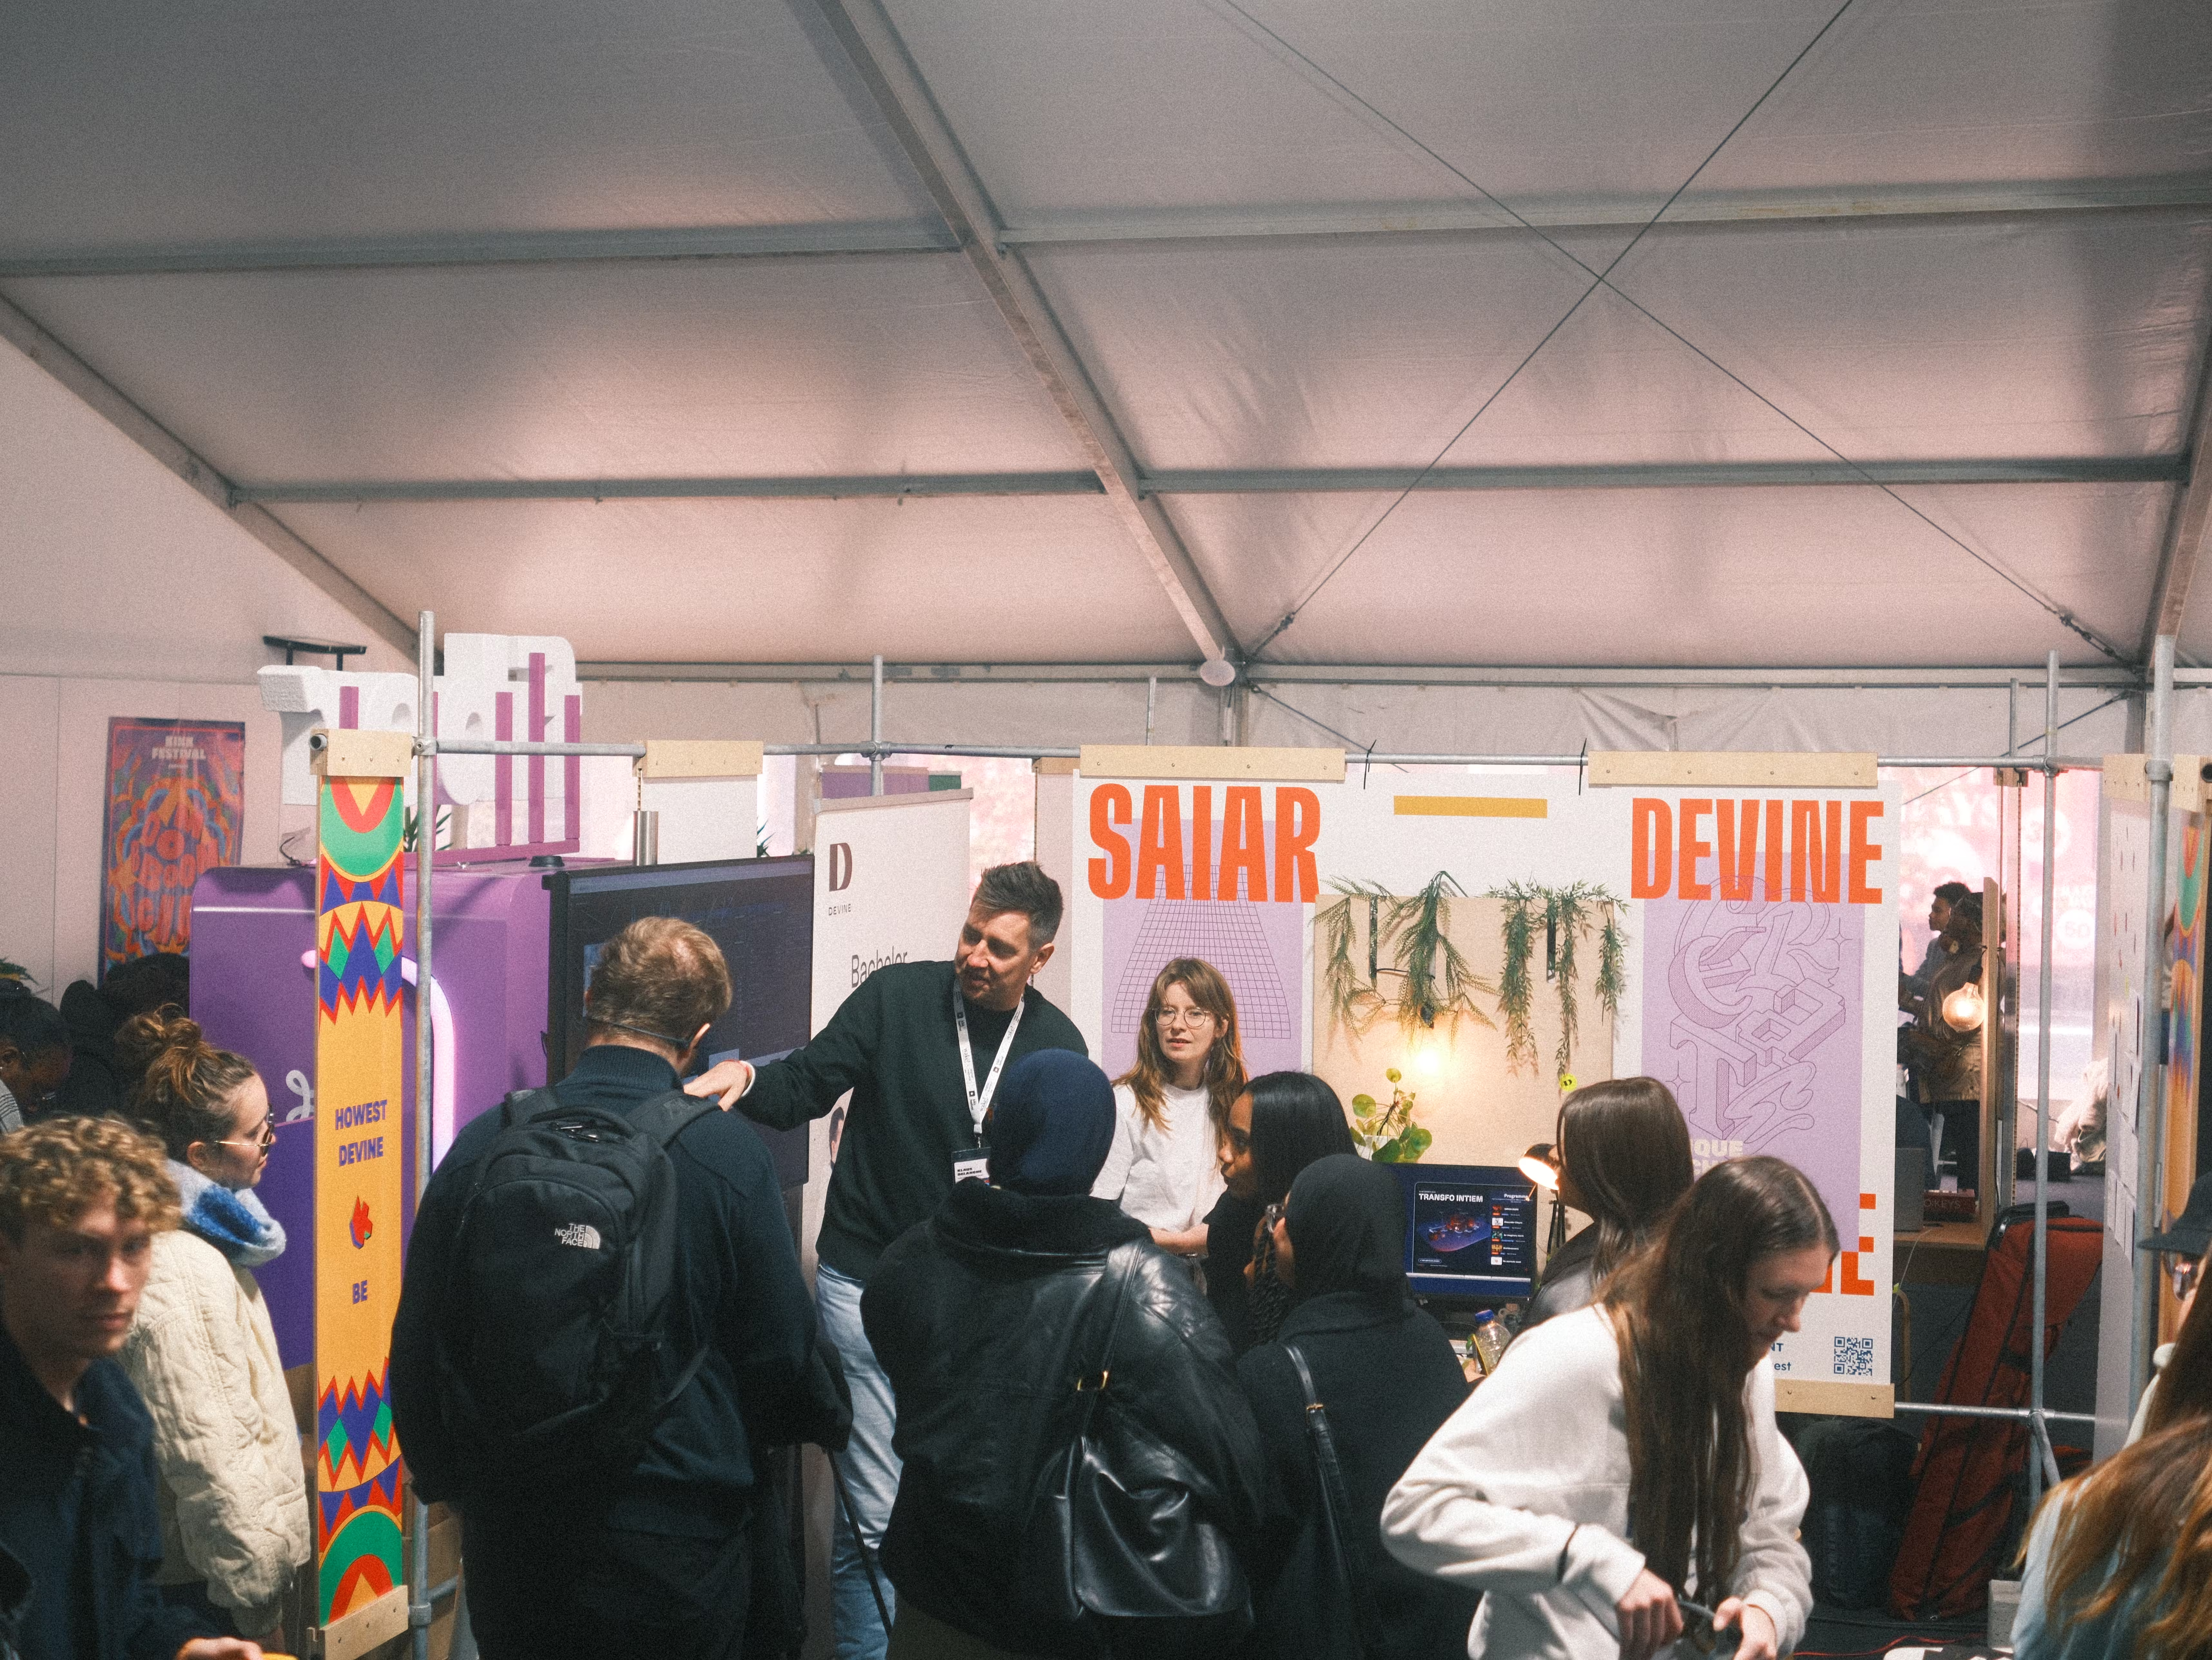
A couple of years ago, our department, Devine, presented a portrait-plotter installation at info-days and festivals. The installation created personalised post-cards with the visitors image - taking a picture, converting it to line art and using an AxiDraw Pen Plotter to create the final result.
The installation worked brilliantly, however: the line art was a bit of hit-or-miss. It used a classical edge detection algorithm, which meant it didn’t necessarily pick up the important features to make somebody recognizable and it sometimes lost itself drawing unnecessary details.
While experimenting with generative AI, we wondered if we could make a version 2.0, where an image generation model would create better line drawings. What we want are line drawings which are recognizable, while keeping the line count down as much as possible: because the more lines we have, the longer our plotter takes to draw.
Creating a line drawing
How can we use Gen AI to create a simplistic line drawing, using local models?
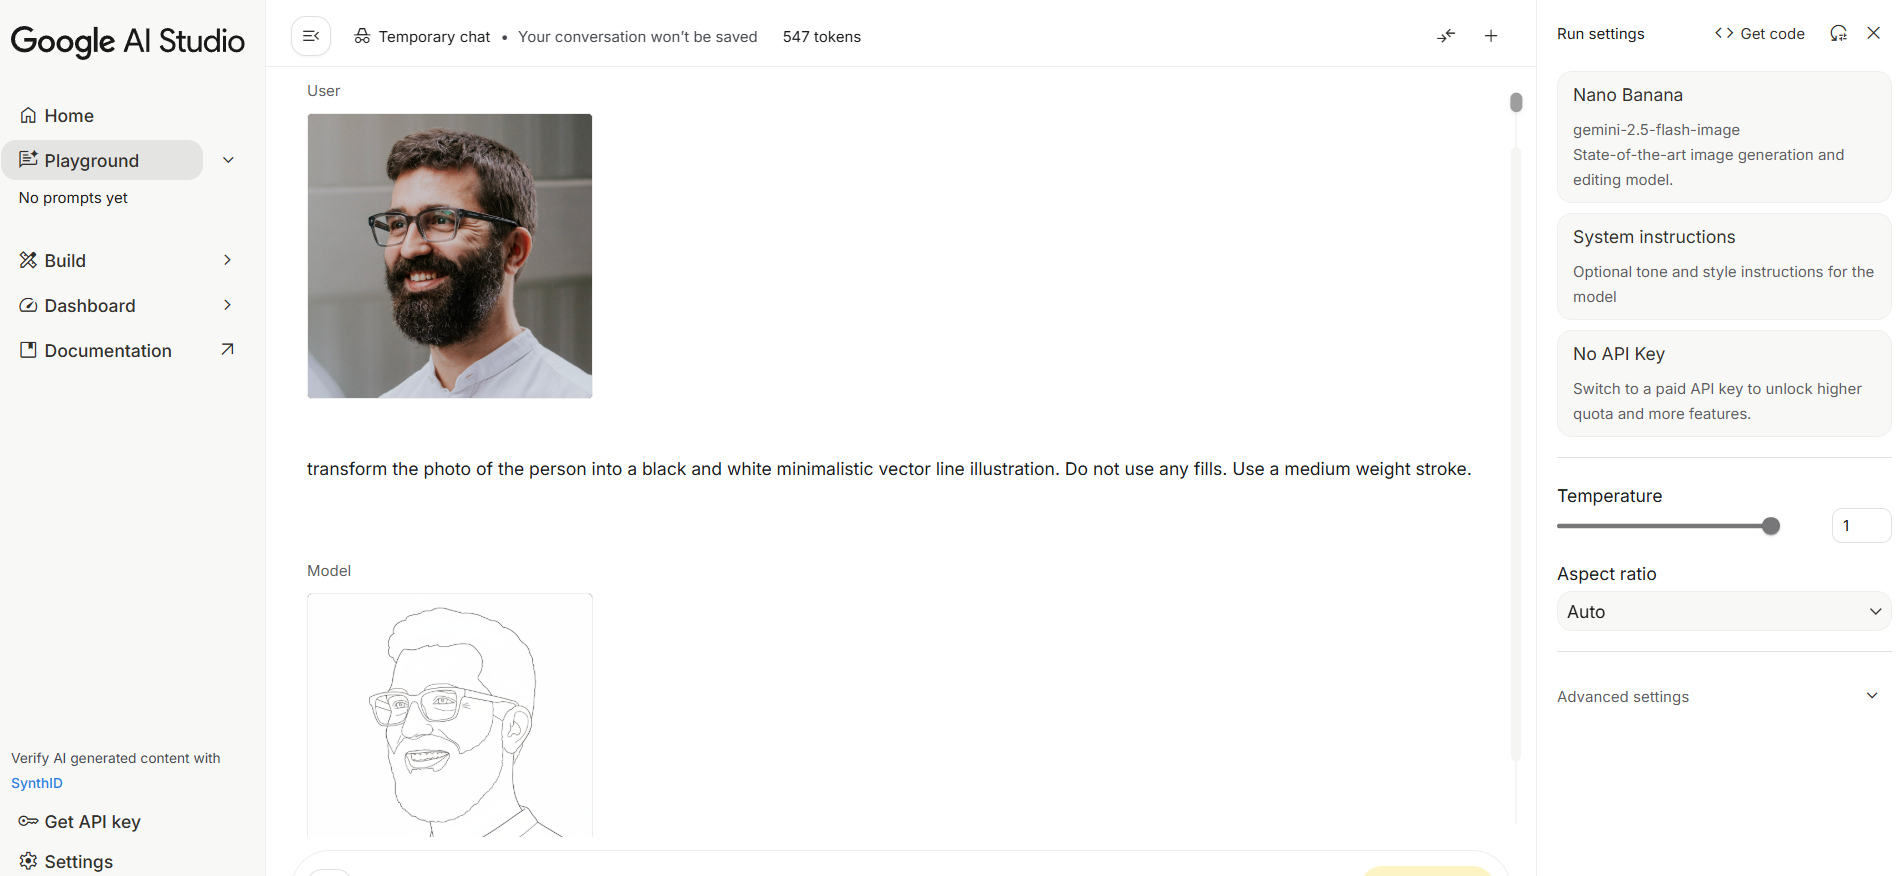
First of all, we created a reference image, using Nano Banana. This can serve as a reference image when using editing models.
Prompt: transform the photo of the person into a black and white minimalistic vector line illustration. Do not use any fills. Use a medium weight stroke.
Testing local models
There are a couple of models we can use locally for style transfer. The most recent ones we found were:
Flux USO
Flux Redux
Flux Kontext Dev
Flux 2
Qwen Image Edit
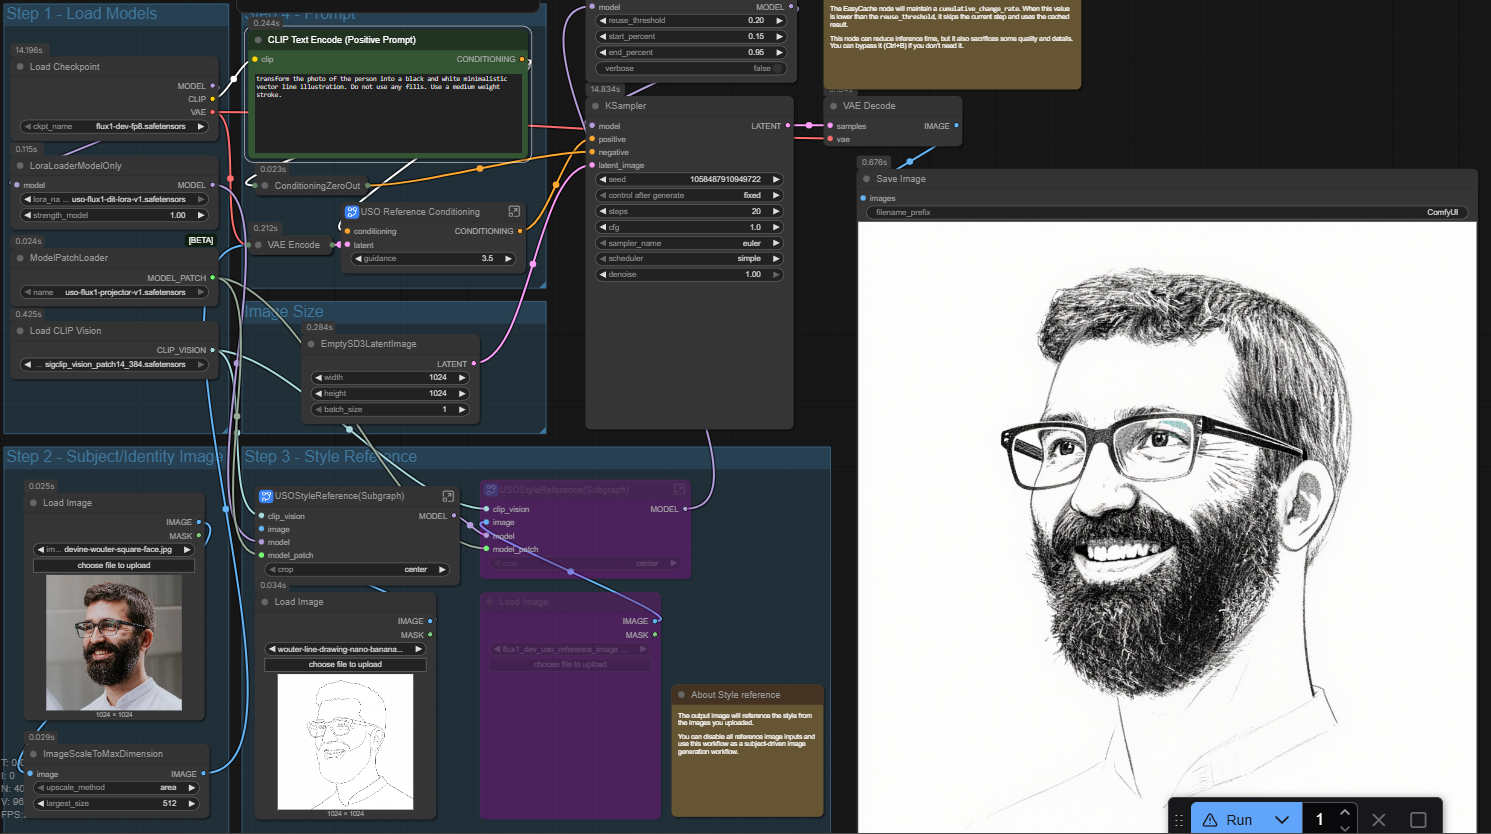
Flux USO
Even with extensive prompting tweaks, it kept returning a sketch style:
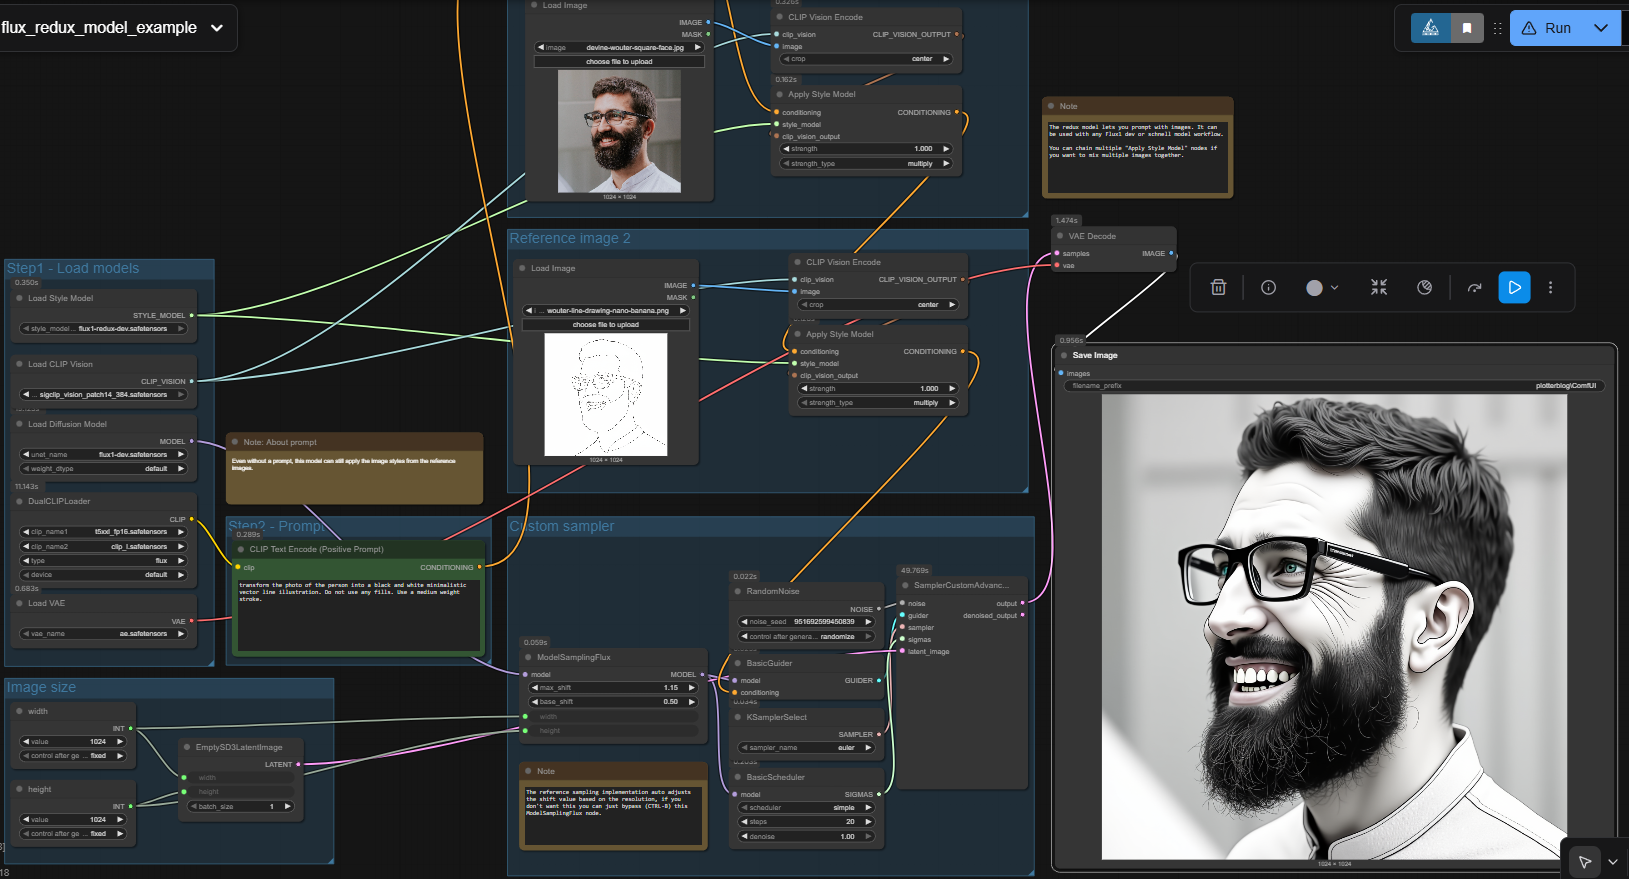
Flux Redux
Redux even stayed further away from the line drawing:
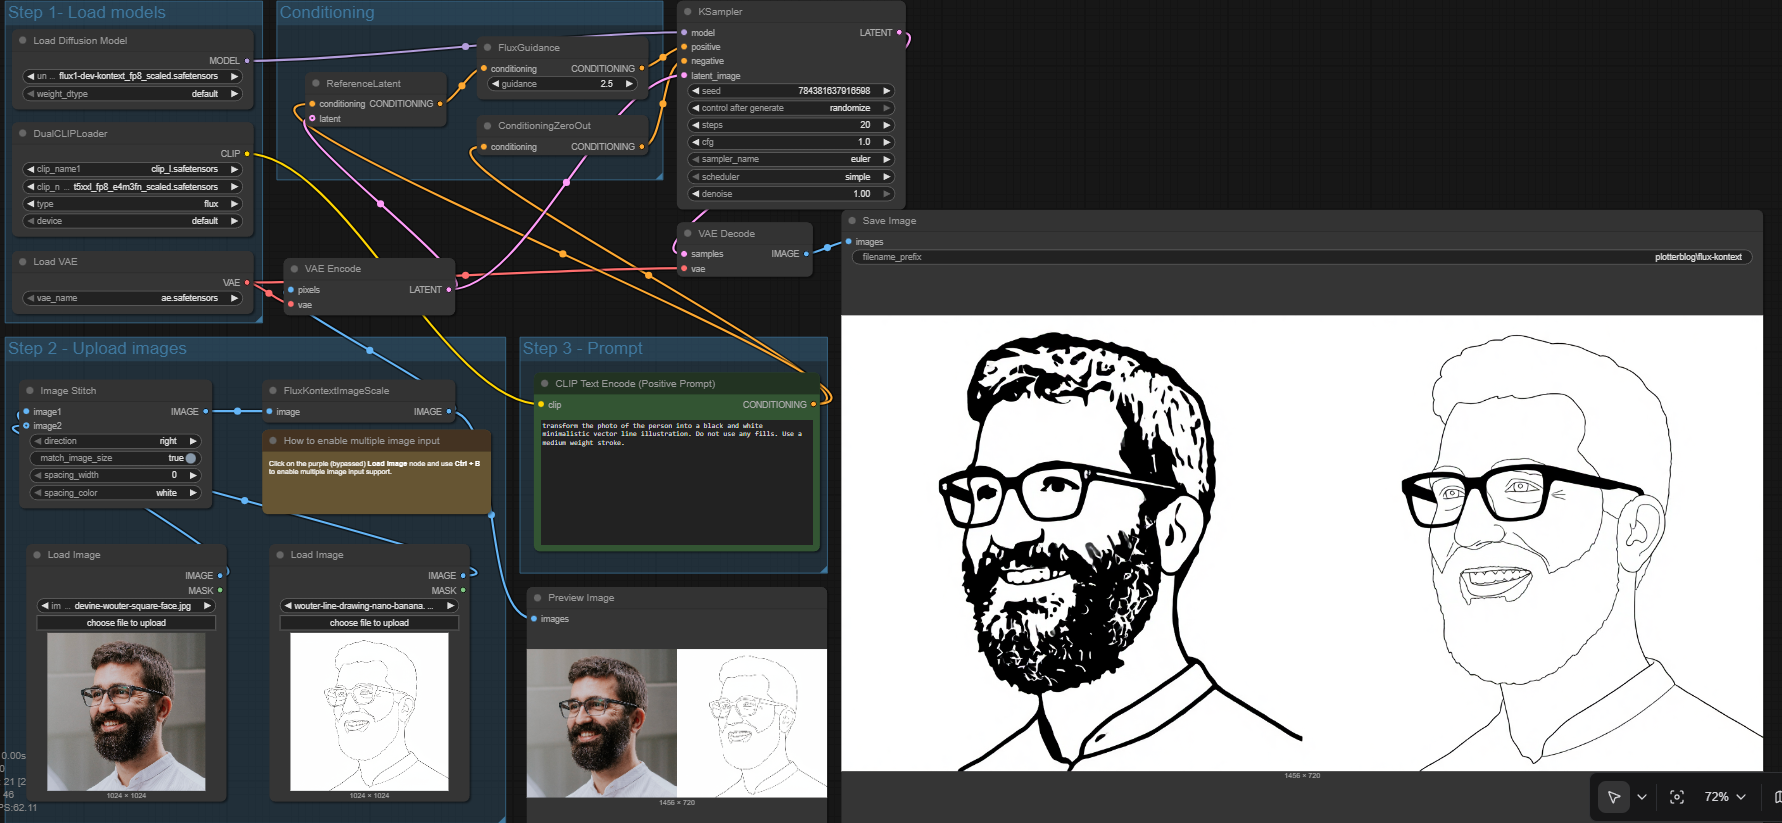
Flux Kontext
The first image out of the default workflow looked promising:
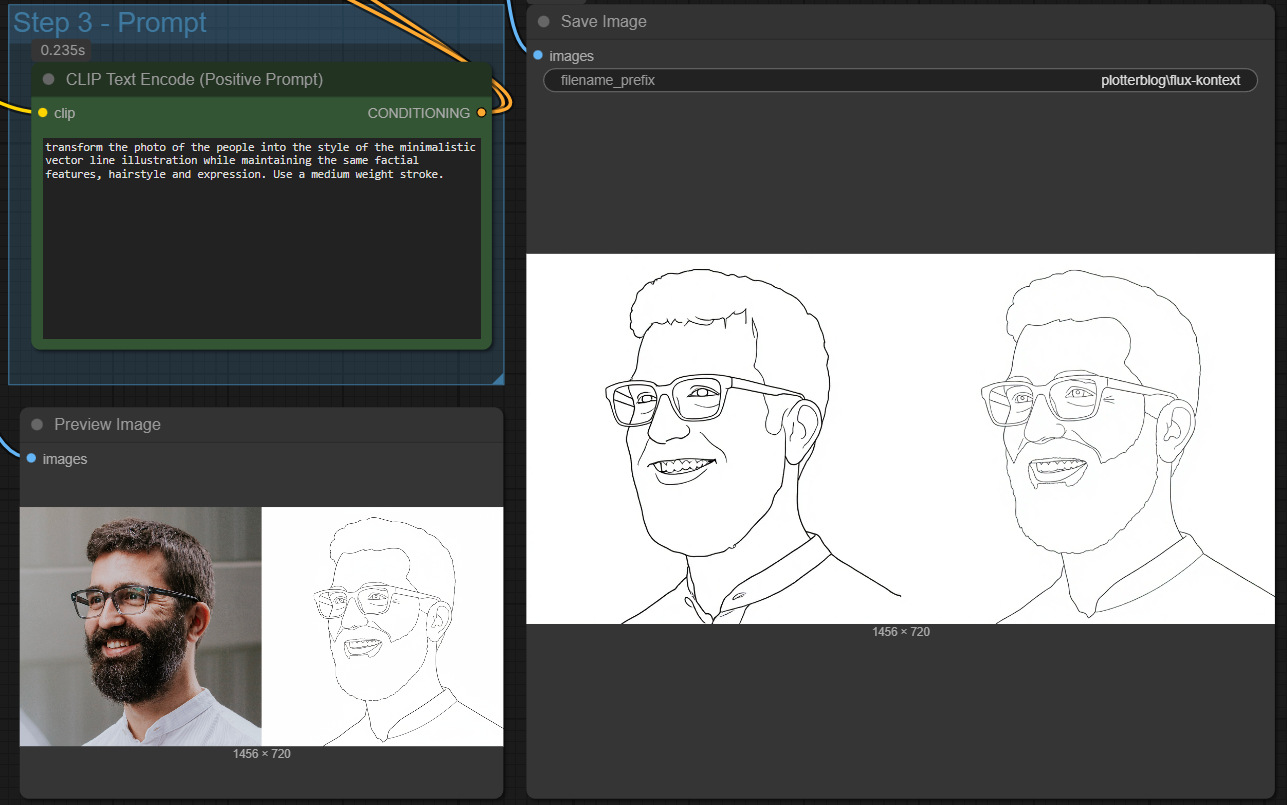
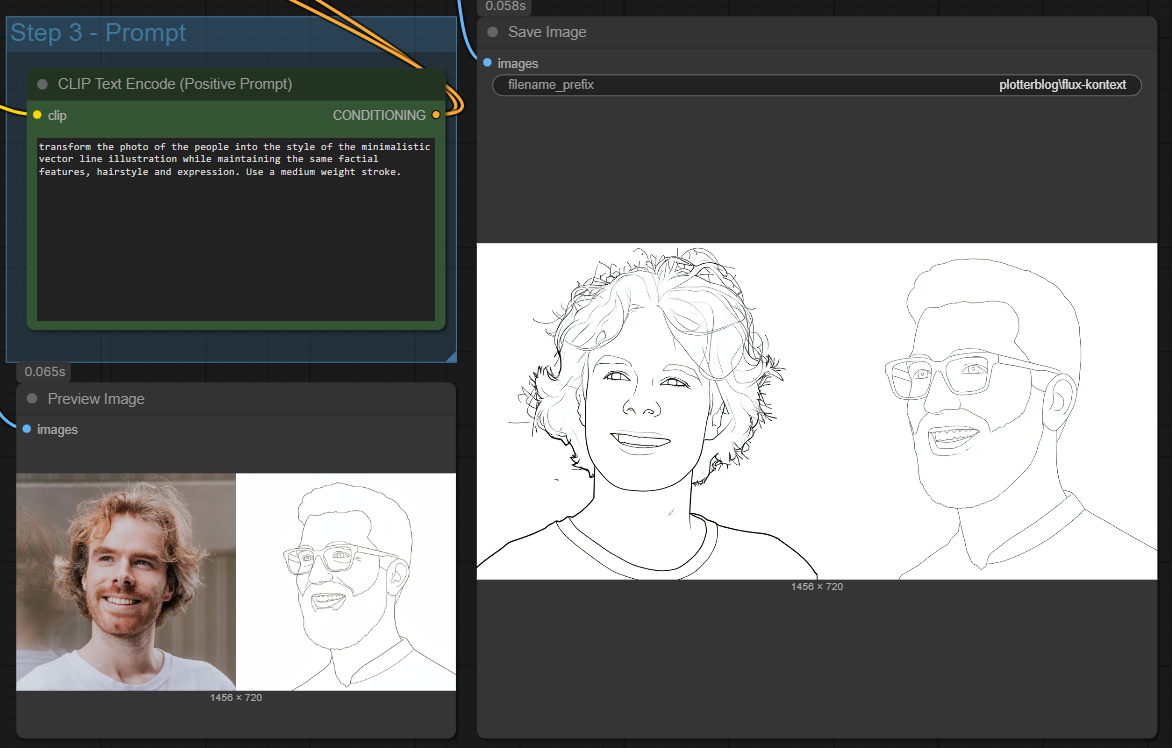
After tweaking the text prompt to transform the photo of the people into the style of the minimalistic vector line illustration while maintaining the same factial features, hairstyle and expression. Use a medium weight stroke. Resulting in:
Flux 2
Flux2 is perfectly capable of generating the desired style. But: it is quite a lot slower: it takes about 70 seconds on our RTX 4090 machine to make the line drawing, versus 20 seconds for Flux Kontext Dev.

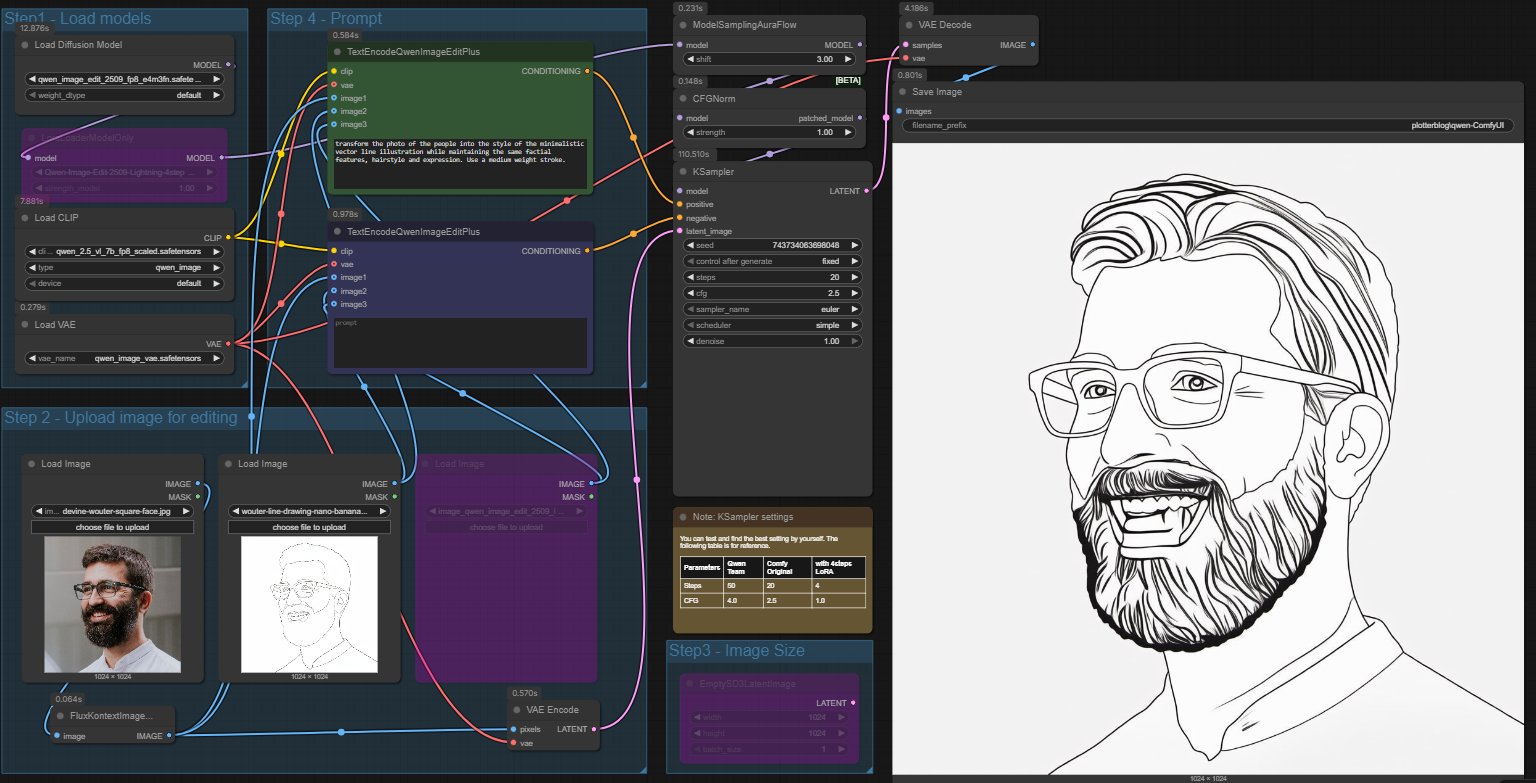
Qwen Image Edit 2509
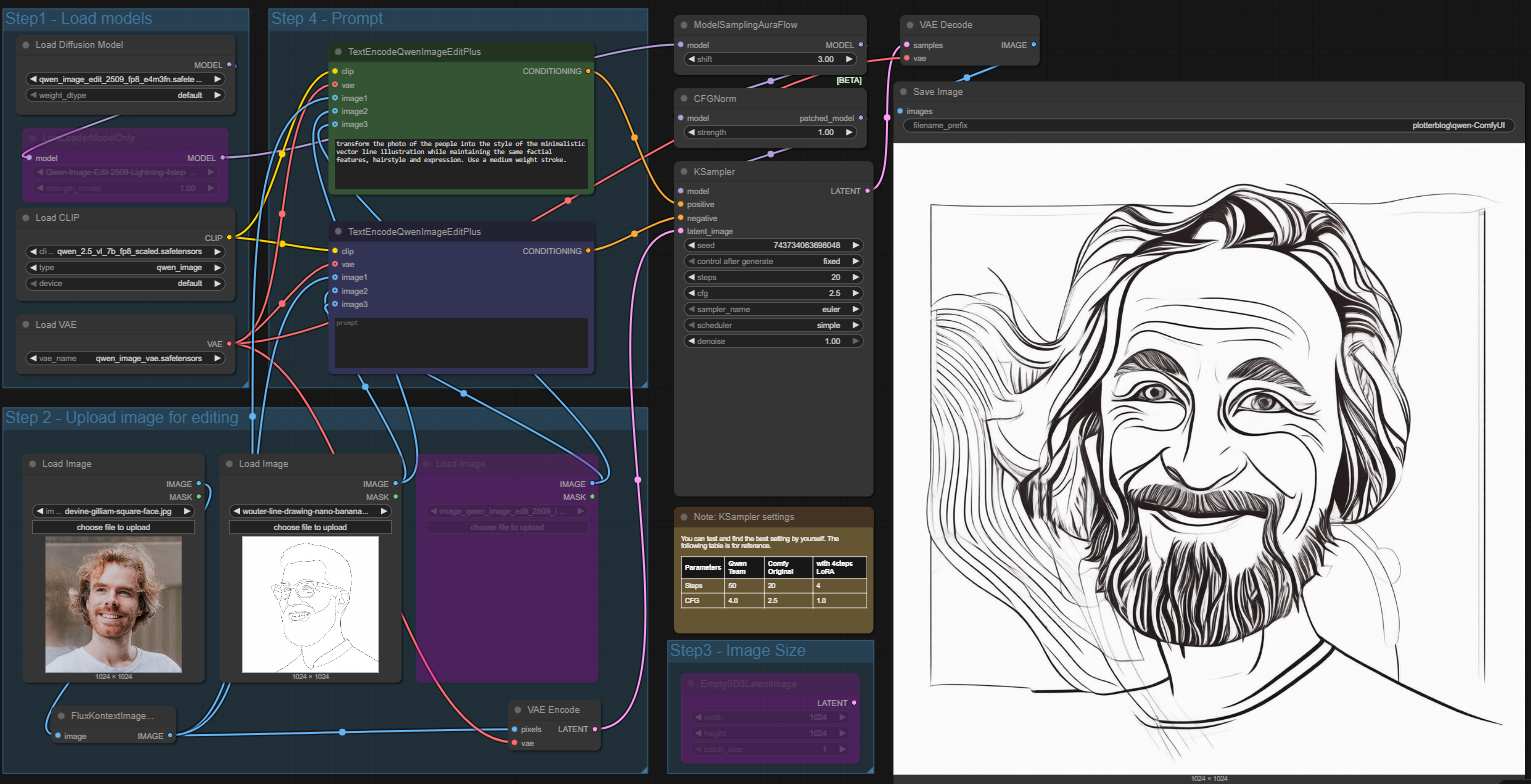
We get a line drawing, but there is too much detail in there. It’s also quite slow: taking 87 seconds on our RTX 4090:
It also mixes features from the two input images:
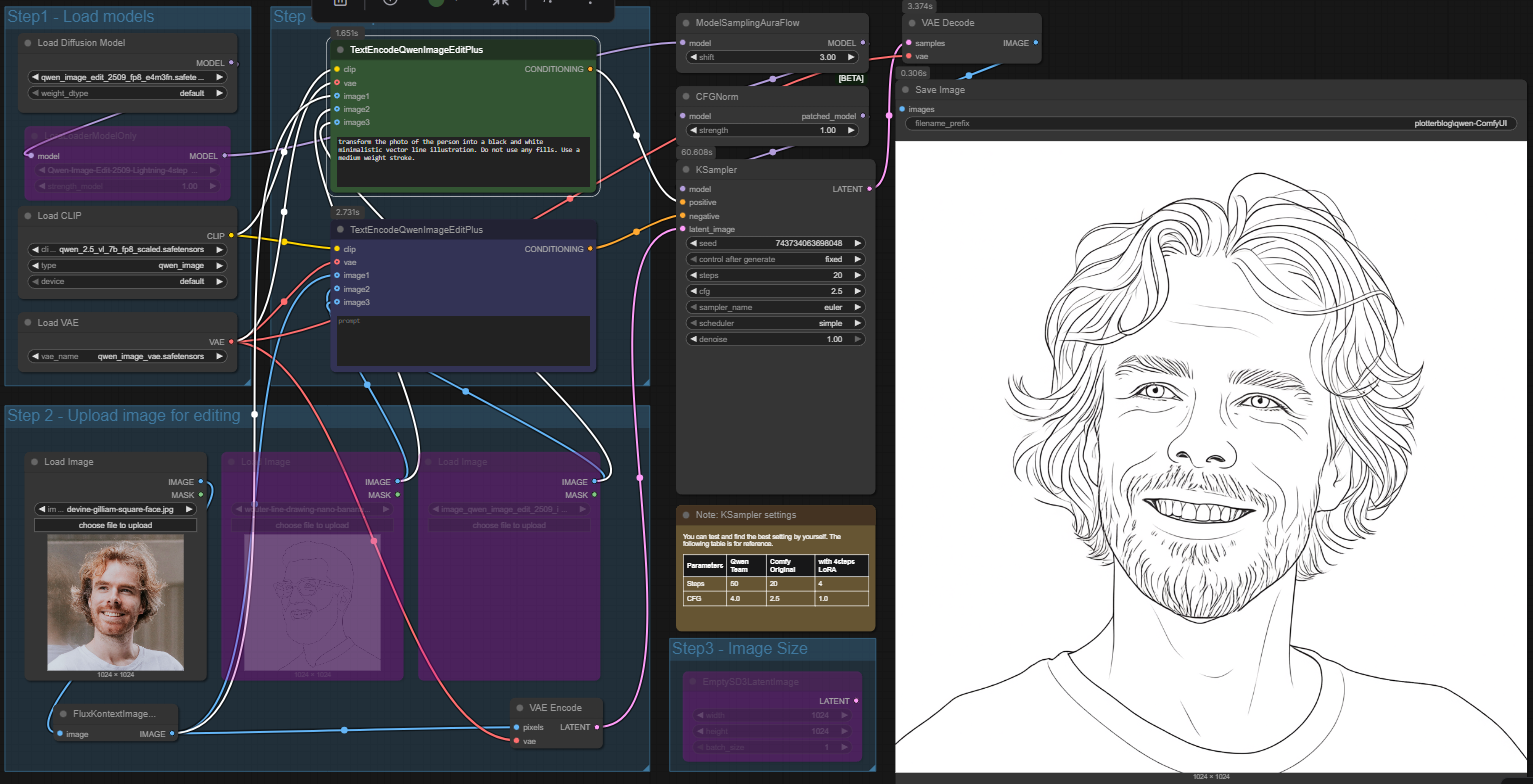
Using no style reference, results in a better image, although it has too much details for a (fast) plotter drawing:
We can speed the sampling process up by using a 4-or 8 step LoRA. But the entire process is still too slow: encoding the image for Qwen takes up time as well, making the drawing process take 50 seconds. It’s also more hit-or-miss because of the lacking style reference:

Our pick: Flux Kontext Dev
After these tests, we decided Flux Kontext Dev offered the best balance between consistency and speed.
Separating people from the background
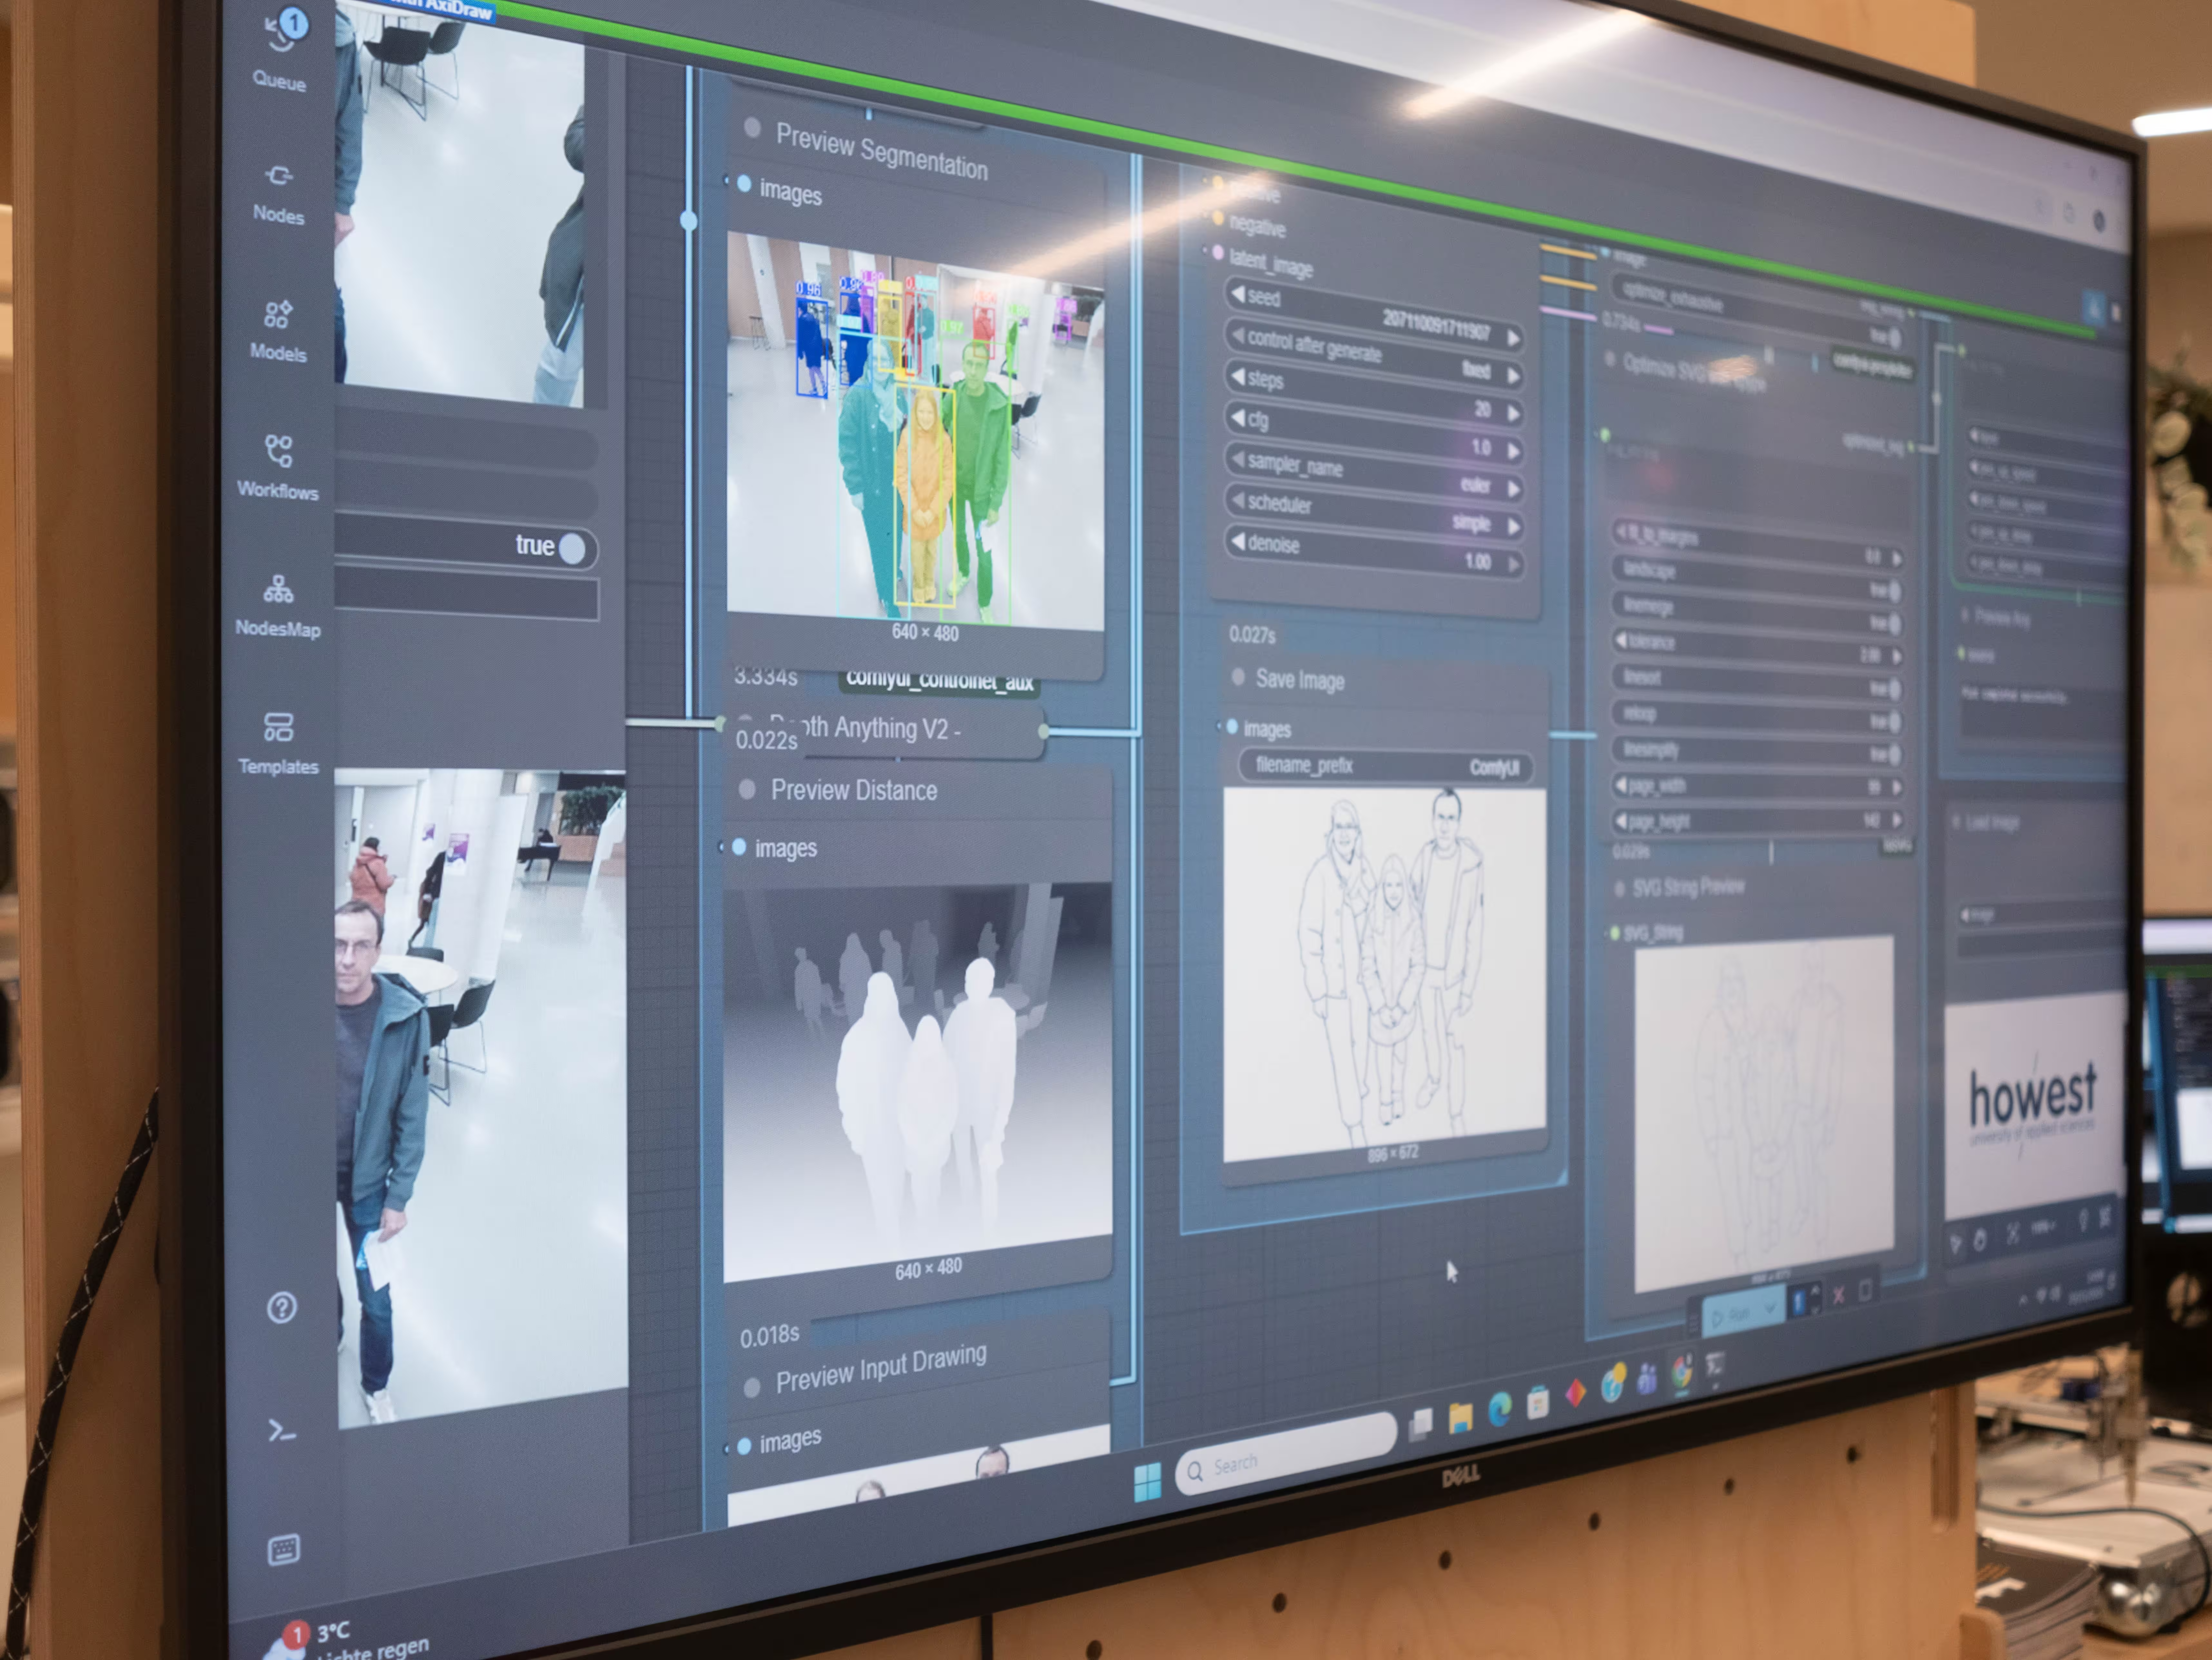
We only want to draw people standing close to our webcam. In order to accomplish this, we’ll be doing a background separation step before we send the picture into our AI model.
We tested a couple of techniques to get a robust solution:
RemBgUltra
DensePose
SAM3 Segmentation
Depth Processing
RemBgUltra
The RemBgUltra node offers an easy way to remove the background contents of a bitmap image:

However, another (crappy) input gives us the following result:

Let’s investigate alternative techniques that give us a little more control over the the background removal.
Densepose
Using the Densepose estimator, we can create a mask solely over people. Combining that mask with the remove background mask results in a better solution:
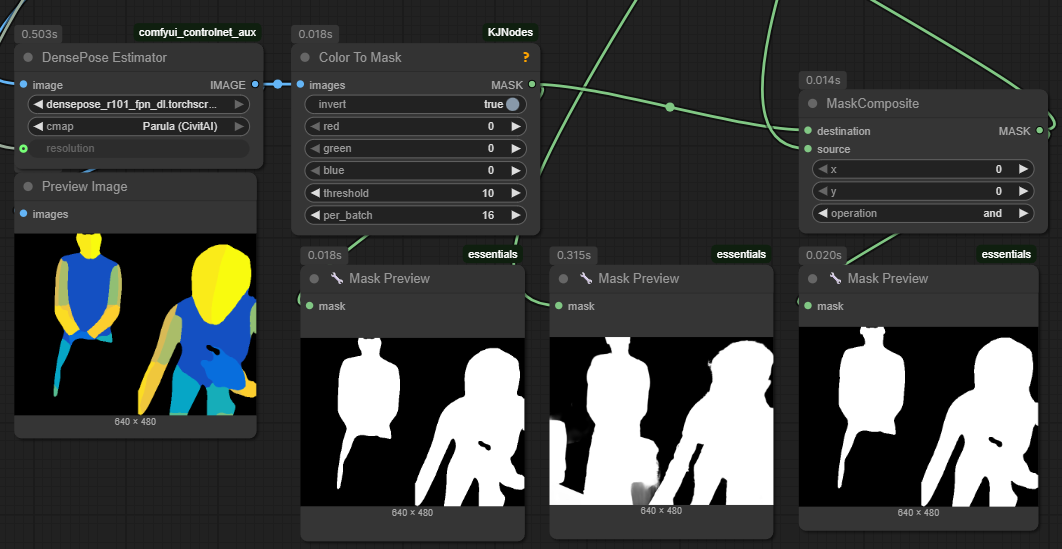
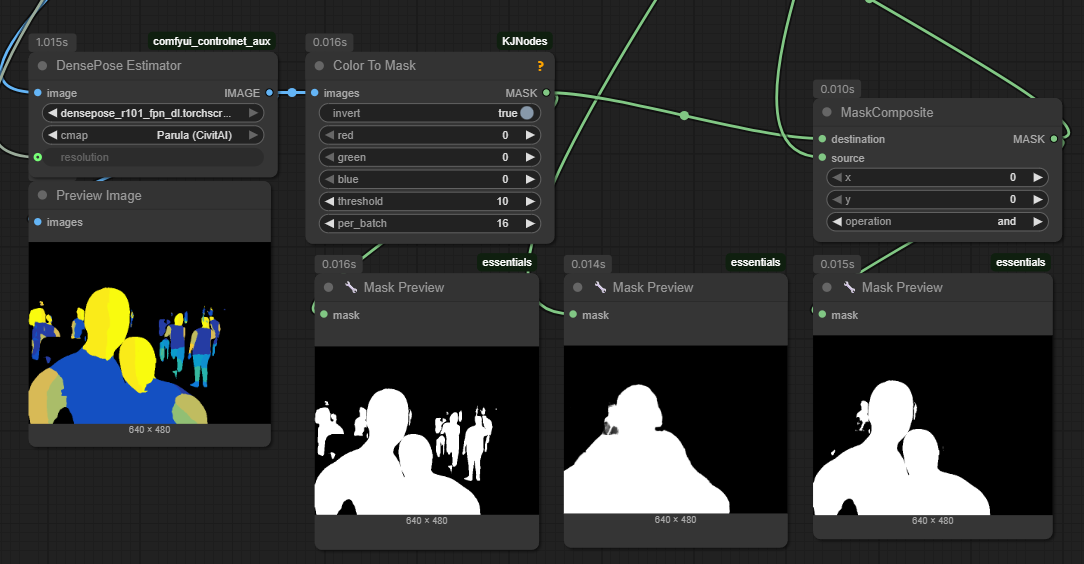

There is one big drawback: people lose their hair with densepose masking!
SAM3
During the process of the plotter build, Meta released their latest version of their semantic segmentation models: SAM3. We decided to get our hands dirty, and write a custom node to do segmentation, with a couple of extra parameters which could be useful for our application.
Our node features:
specify a minimum threshold (score)
specify a minimum width and height for the boxes
output a mask batch and a combined mask

You can find it at https://github.com/wouterverweirder/comfyui_sam3/
Depth
In order to ignore people in the background, we can use a depth preprocessor and threshold it. We can then combine it with the SAM3 mask, to just get people within a given distance:

Live Webcam Cropping
Quite often we do not want the default FOV of the webcam, but need a zoomed-in / cropped view instead. While we can modify the output of the webcam, it would be more efficient to have a live-preview of a modified webcam feed, without needing to run the workflow. We also do not want to install extra software with virtual webcams. A drawback of the built-in ComfyUI webcam node, is you cannot “live preview” any additional cropping you want to do on the image.
Starting from the default webcam
Using the comfyui cli tool and the custom-nodes documentation, you’re able to implement custom nodes quite fast.
We scaffolded a custom node template using the comfy-cli: comfy node scaffold - we chose to have front-end logic as well, with vanilla js, in order to keep the build set-up & dependencies as easy as possible.
We then went into the generated code, and copy pasted logic from the built-in webcam node, and ended up with a working copy of the webcam node.
Built-in webcam python code sits in https://github.com/comfyanonymous/ComfyUI/blob/master/comfy_extras/nodes_webcam.py
Built-in webcam front-end code can be found at https://github.com/Comfy-Org/ComfyUI_frontend/blob/main/src/extensions/core/webcamCapture.ts
Live Trimming
We then removed the capture_on_queue button with separate img preview (as we will show a live canvas view), and added trimming controls. We also moved the video stream initialisation to the nodeCreated callback, since we need access to the widget values in the video loop.
Webcam Selection
We wanted an option to select which camera you want to use, in case there are multiple device options.
We tried the following logic to get the video devices:
const listVideoDevices = async () => {
  const devices = await navigator.mediaDevices.enumerateDevices()
  return devices.filter((device) => device.kind === 'videoinput')
}
On Chrome, it gave us all devices. However, on Safari, it only gave us 1 (default) device.
Looking at the simple demo + code at https://simpl.info/getusermedia/sources/, we found out that Safari only gives you a full device list, after getUserMedia is called.
We modified the initialisation code to do an initial call, so I can get the full device list:
const init = async () => {
  // safari needs a call to getUserMedia before being able to list devices
  const stream = await navigator.mediaDevices.getUserMedia({ video: true, audio: false })
  stream.getTracks().forEach((track) => track.stop())
  const devices = await listVideoDevices()
  deviceWidget.options = {
    ...deviceWidget.options,
    values: devices.map(device => (device.deviceId )),
  }
  deviceWidget.callback = async () => {
    await loadVideo()
  }
  await loadVideo()
  step()
}
We ended with a node that allows you to:
Select a webcam from a list
Request a (higher) resolution and frame rate
Crop the image with live preview
Streaming a window / screen
We get the webcam feed using webrtc on the front end. This means we could also another piece of the webrtc api to get live feeds of a screen or window.
MJPG Streaming
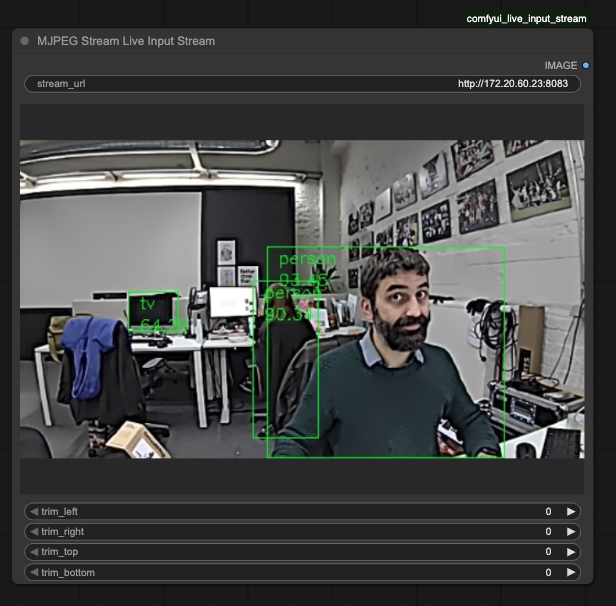
Lets add one more node, to connect to an mjpg stream. Ideally, we could use that node to get a camera feed of our OAK 4D Pro cameras.
We deployed a camera feed example app to the camera, where we could open the stream at http://172.20.60.23:8083
Because we will run into CORS issues on the client, we’ll proxy it through a python proxy, included in our custom node pack.
Sidequest: Depth feed
We then modified the OAK4 example code, to show just the depth feed:
main.py
import cv2
import depthai as dai
from depthai_nodes.node import ApplyColormap
from utils.arguments import initialize_argparser
from utils.mjpeg_streamer import MJPEGStreamer

_, args = initialize_argparser()


device = dai.Device(dai.DeviceInfo(args.device)) if args.device else dai.Device()


with dai.Pipeline(device) as pipeline:
    print("Creating pipeline...")

    left = pipeline.create(dai.node.Camera).build(dai.CameraBoardSocket.CAM_B)
    left_out = left.requestOutput(
        size=(640, 480), type=dai.ImgFrame.Type.NV12, fps=args.fps_limit
    )

    right = pipeline.create(dai.node.Camera).build(dai.CameraBoardSocket.CAM_C)
    right_out = right.requestOutput(
        size=(640, 480), type=dai.ImgFrame.Type.NV12, fps=args.fps_limit
    )

    stereo = pipeline.create(dai.node.StereoDepth).build(left=left_out, right=right_out)
    stereo.setRuntimeModeSwitch(True)
    stereo.initialConfig.setLeftRightCheck(True)
    stereo.initialConfig.setConfidenceThreshold(15)
    stereo.initialConfig.setSubpixelFractionalBits(3)
    stereo.initialConfig.setMedianFilter(dai.MedianFilter.KERNEL_7x7)

    depth_color = pipeline.create(ApplyColormap).build(arr=stereo.disparity)
    depth_color.setColormap(cv2.COLORMAP_JET)

    mjpeg_streamer = pipeline.create(MJPEGStreamer).build(
        preview=depth_color.out,
    )

    pipeline.run()
mjpeg_streamer
import threading
from typing import List

import cv2
import depthai as dai
import numpy as np

from utils.server import ThreadedHTTPServer, VideoStreamHandler

HTTP_SERVER_PORT = 8083


FONT = cv2.FONT_HERSHEY_SIMPLEX
COLOR = (0, 255, 0)


class MJPEGStreamer(dai.node.HostNode):
    def __init__(self) -> None:
        super().__init__()

    def build(
        self, preview: dai.Node.Output
    ) -> "MJPEGStreamer":
        self.link_args(preview)
        self.sendProcessingToPipeline(True)

        # Start server
        self.server = ThreadedHTTPServer(
            ("0.0.0.0", HTTP_SERVER_PORT), VideoStreamHandler
        )
        th = threading.Thread(target=self.server.serve_forever)
        th.daemon = True
        th.start()
        print("To view the MJPEG stream go to http://localhost:8083")

        return self

    def process(self, preview: dai.Buffer) -> None:
        assert isinstance(preview, dai.ImgFrame)

        frame = preview.getCvFrame().copy()

        self.server.frametosend = frame
Et voila: the depth feed of an OAK 4D camera, playing in ComfyUI:
Custom node pack
You can find this custom node pack at https://github.com/wouterverweirder/comfyui_live_input_stream
Vectorizing
The AxiDraw plotter needs a vector line image as an input. The previous iteration of the plotter used the https://github.com/LingDong-/linedraw library. Running the script, it resulted in something like this:

Even when playing with the different arguments (contour-simplify, nh, nc), we never got a decent SVG out of it.
ComfyUI-ToSVG
We stumbled upon https://github.com/Yanick112/ComfyUI-ToSVG which mentions https://github.com/visioncortex/vtracer and https://github.com/tatarize/potrace
When trying to install it, we ran into the following error:
Cargo, the Rust package manager, is not installed or is not on PATH. [!] This package requires Rust and Cargo to compile extensions. Install it through [!] the system's package manager or via https://rustup.rs/
We installed https://www.rust-lang.org/tools/install and rebooted (in order to have the PATH update loaded)
After hooking up an Image to SVG String BW VTracer node, we received an svg which looked like this:

vpype
Before we send a vector drawing over to the plotter, we need to run it through vpype.
In order to install vpype on windows, you’ll need to install pipx:
py -m pip install pipx
And then install vpype:
pipx install vpype[all]
pipx ensurepath
After a system reboot, we had vpype available in our cli. A simple vpype read wouter.svg linesort write output.svg resulted in the following result:
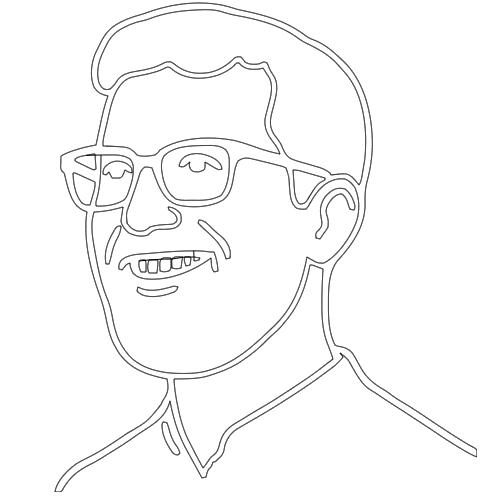
Not really what we want. Instead of shape outlines, we need center tracing on the shapes.
Center Lines
An online solution
There’s an online tool which allows you to upload an image and get a centerline version back: https://online.rapidresizer.com/tracer.php
This online tool is able to create a drawing like this based upon an input bitmap:

We can pass this into vpype, and get a similar result as the tracer output.
When the illustration has some more detail, it looks surprisingly good:

Local centerline
Using the online tools is not an option, we need an offline way of getting the centerlines from the polygon.
pyautotrace
We installed pyautotrace into my vpype venv py -m pip install pyautotrace
Converting the image with the provided autotrace script, was unsatisfactory:

raster-retrace
An alternative solution is https://crates.io/crates/raster-retrace which you can install through cargo:
cargo install raster-retrace
This tool only works with ppm file inputs, so we converted the png to a ppm using https://convertio.co/download/bb97fc6bd5d44d24e79e4fa391afe5c4092884/
Using raster-retrace -i giliam.ppm -o retrace.svg -m CENTER --optimize-exhaustive resulted in this SVG:
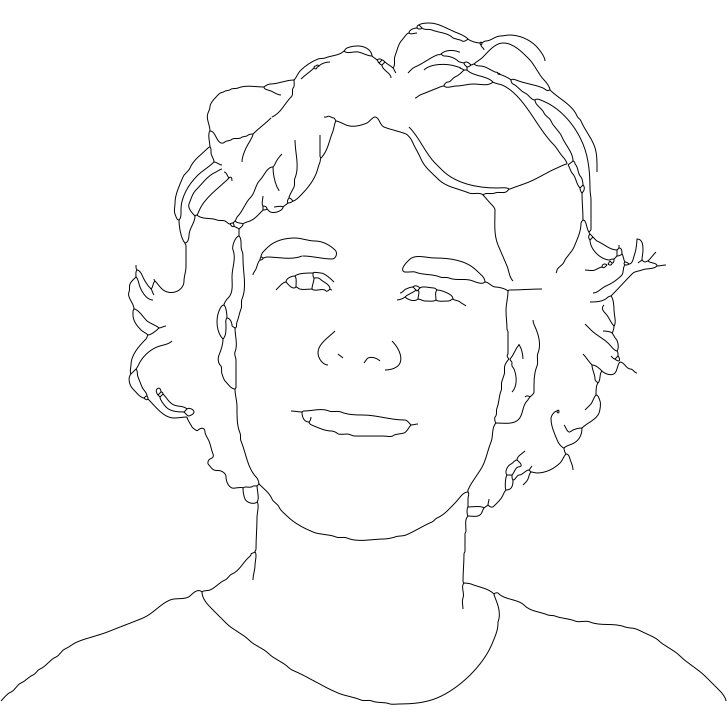
Passing it through vpype has this result:
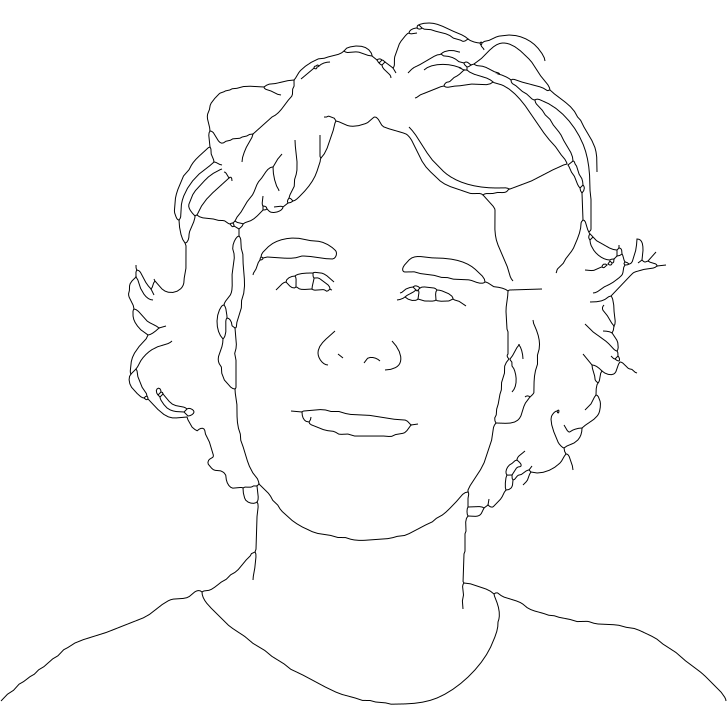
skeleton tracing
We didn’t really like the rust dependency (raster-retrace) to get the centerline. We’d prefer to keep the centerline logic in Python.
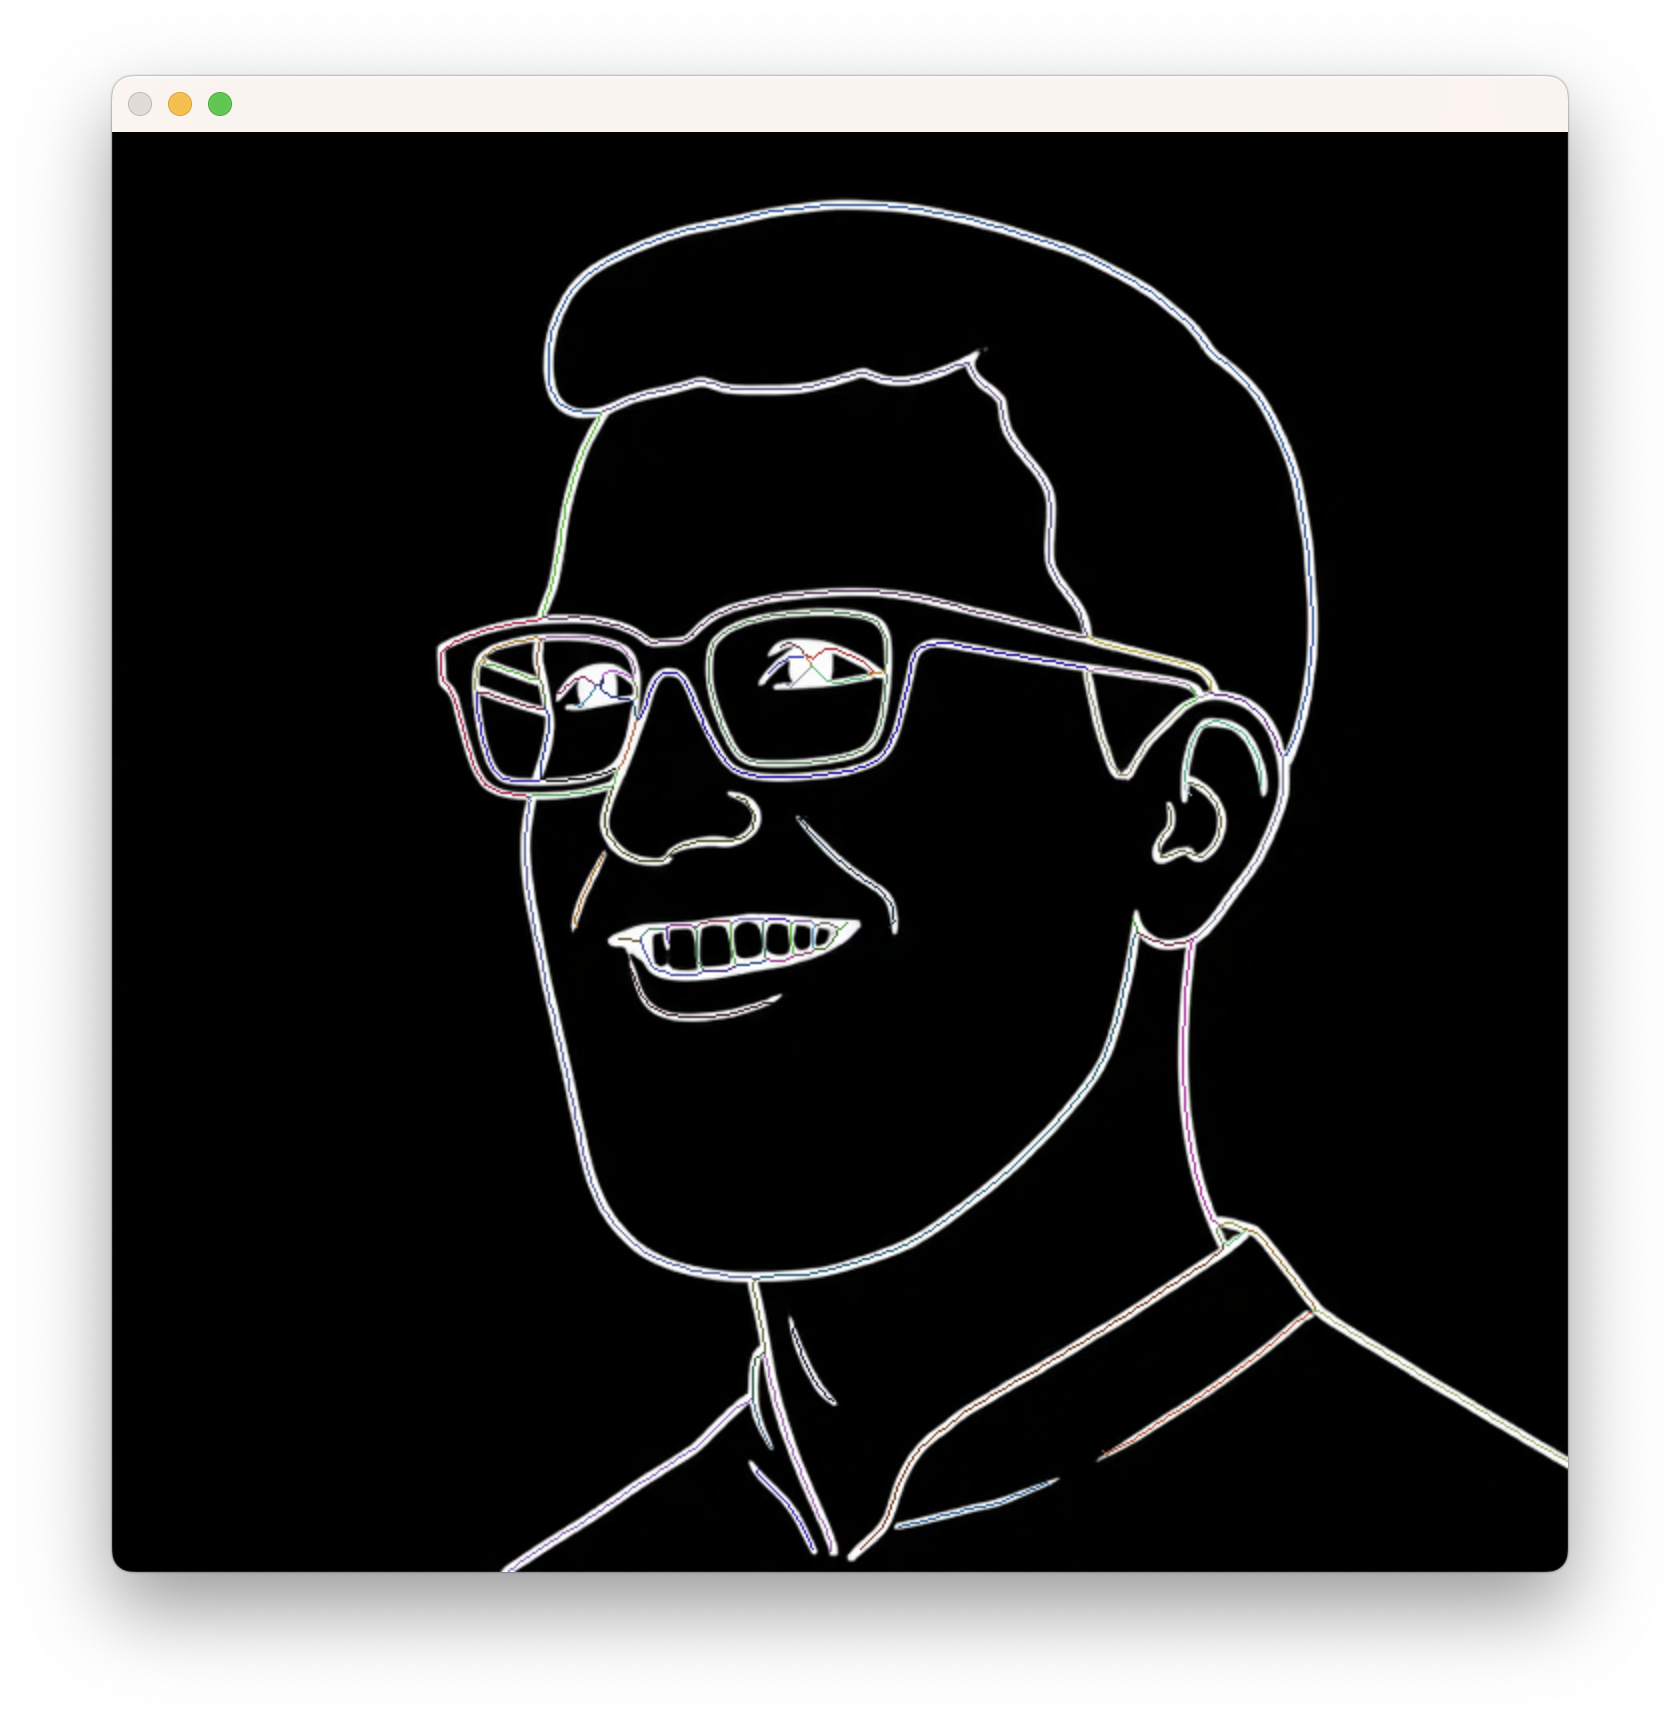
We found the https://github.com/LingDong-/skeleton-tracing?tab=readme-ov-file repository, which seems promising. Its pure python solution seems to work, although it is quite slow: it takes about 13 seconds to do a trace of one of the typical comfyui line outputs:
Swig
They also have a “swig” implementation: a binding between python and native c code, which is supposed to be a lot faster.
The swig binaries on the repo did not work on our hardware, so we needed to build them ourselves.
We downloaded swig from https://www.swig.org/download.html and compiled + installed it:
./configure
$ make
$ sudo make install
We then moved into the swig directory of the skeleton-tracing repo and compiled that project
swig -python trace_skeleton.i
gcc -O3 -c trace_skeleton.c trace_skeleton_wrap.c -I/Users/wouter/.pyenv/versions/3.11.7/include/python3.11
gcc $(python3-config --ldflags) -dynamiclib *.o -o _trace_skeleton.so -I/Users/wouter/.pyenv/versions/3.11.7/lib/libpython3.11.dylib -undefined dynamic_lookup
This swig implementation was a lot faster. We did need to convert our image inputs to 2-channel images (and invert them) for it to work
im = cv2.imread("../test_images/linedrawing-wouter.png")

_,im = cv2.threshold(im,128,255,cv2.THRESH_BINARY)

# make it a 2-channel image
if len(im.shape)==3:
	im = cv2.cvtColor(im,cv2.COLOR_BGR2GRAY)

# invert colors
im = 255 - im
We can then create a stroke svg with the following code:
open('output.svg','w').write(
  f'<svg xmlns="http://www.w3.org/2000/svg" width="{im.shape[1]}" height="{im.shape[0]}"><path stroke="red" fill="none" d="'+" ".join(
  ["M"+" ".join([f'{x[0]},{x[1]}' for x in y]) for y in polys]
)+'"/></svg>')
It works. But… requiring the swig binary doesn’t solve the non-python dependencies. We do not want to rely on a compilation step when somebody needs to use the trace algorithm.
Optimizing the native Python code
Let’s see if there is room for improvement for the native Python code. We asked Claude Sonnet to optimise the file. It concluded with the following optimizations:
Added Numba JIT compilation (
@jit(nopython=True)) to:thinningZSIteration()- The most critical bottleneck with nested loopschunkToFrags()- Another function with nested loops
Fixed
notEmpty()function - Changed fromnp.sum(im) > 0tonp.any(im[y:y+h, x:x+w])which:Properly slices the image region (the original version summed the entire image!)
Uses
np.any()which is faster and more appropriate for boolean checks
Replaced nested loops with NumPy slicing in
traceSkeleton():Horizontal seam search:
np.sum(im[i-1:i+1, x:x+w])instead of nested loopVertical seam search:
np.sum(im[y:y+h, j-1:j+1])instead of nested loop
These optimizations resulted in a 15-20x speed increase!
Adding caching, even improves it further, as there is no compile step involved on subsequent runs. I can now run the centerlineTrace logic in 0.4 seconds, where it used to take about 18 seconds in the original code. This is a 45x speed increase.
We opened up a pull request with these optimizations - https://github.com/LingDong-/skeleton-tracing/pull/29
This is a better solution than raster-retrace, because we have no non-python dependencies.
Custom Pen Plotter ComfyUI Nodes
We want to incorporate the center tracing in our ComfyUI flow. As there currently is no node that offers the solution we want (skeleton tracing), we had to create one ourselves.
Center Line Node
The first node we created, is one to convert a bitmap image into a centerline SVG image:

AxiDraw Node
We also added two more custom nodes to do the vpype conversion and axidraw command. To keep things easy, we’re running the commands, instead of using the python library.

Interrupting a plot
Right now the plotter started drawing, and we were unable to stop the plotting process when we cancel the prompt.
We needed to find a way to catch those interruptions in our custom node and kill the axidraw process.
A deep dive into the ComfyUI core code pointed us towards the comfy.model_management.interrupt_current_processing function. We can wrap it and execute our own logic when it fires:
# Overwrite or wrap comfy.model_management.interrupt_current_processing
_original_interrupt = comfy.model_management.interrupt_current_processing

def wrapped_interrupt_current_processing(*args, **kwargs):
    print("Interrupt requested from Pen Plotter node.")
    return _original_interrupt(*args, **kwargs)

comfy.model_management.interrupt_current_processing = wrapped_interrupt_current_processing
By keeping track of the axidraw subprocess in a global variable, we can then kill that subprocess when the interrupt function is called:
# Global variable to track the currently running subprocess for interruption
_current_subprocess = None

# Overwrite or wrap comfy.model_management.interrupt_current_processing
_original_interrupt = comfy.model_management.interrupt_current_processing

def wrapped_interrupt_current_processing(*args, **kwargs):
    global _current_subprocess
    result = _original_interrupt(*args, **kwargs)
    if args and args[0] is True:
        print("[PenPlotter] Processing interrupted.")
        # Interrupt the running subprocess if needed
        if _current_subprocess is not None:
            try:
                print("[PenPlotter] Terminating running subprocess...")
                _current_subprocess.terminate()
                # Give the process a moment to terminate gracefully
                try:
                    _current_subprocess.wait(timeout=2)
                except subprocess.TimeoutExpired:
                    # If it doesn't terminate gracefully, force kill it
                    print("[PenPlotter] Force killing subprocess...")
                    _current_subprocess.kill()
                    _current_subprocess.wait()
                print("[PenPlotter] Subprocess terminated.")
                _current_subprocess = None
            except Exception as e:
                print(f"[PenPlotter] Error terminating subprocess: {e}")
                _current_subprocess = None
    return result

comfy.model_management.interrupt_current_processing = wrapped_interrupt_current_processing
This allowed us to stop the current prompt and immediately stop the plotter process. However: this immediately stop the plotter at it’s current position, locking it in place. At a minimum, it should disengage the motor as well, so that we can reset it to the starting position.
We added some finalizing logic after killing the subprocess to send an alignment command to the axidraw
        # run the disengage command to put the plotter in a safe state
        cmd = ['axicli', '--mode', 'align']
        try:
            subprocess.run(cmd, check=True)
            print("[PenPlotter] Plotter disengaged successfully.")
        except Exception as e:
            print(f"[PenPlotter] Error disengaging plotter: {e}")
And added similar logic at the end of a plot. That way the motor always disengages.
Wrapping Up
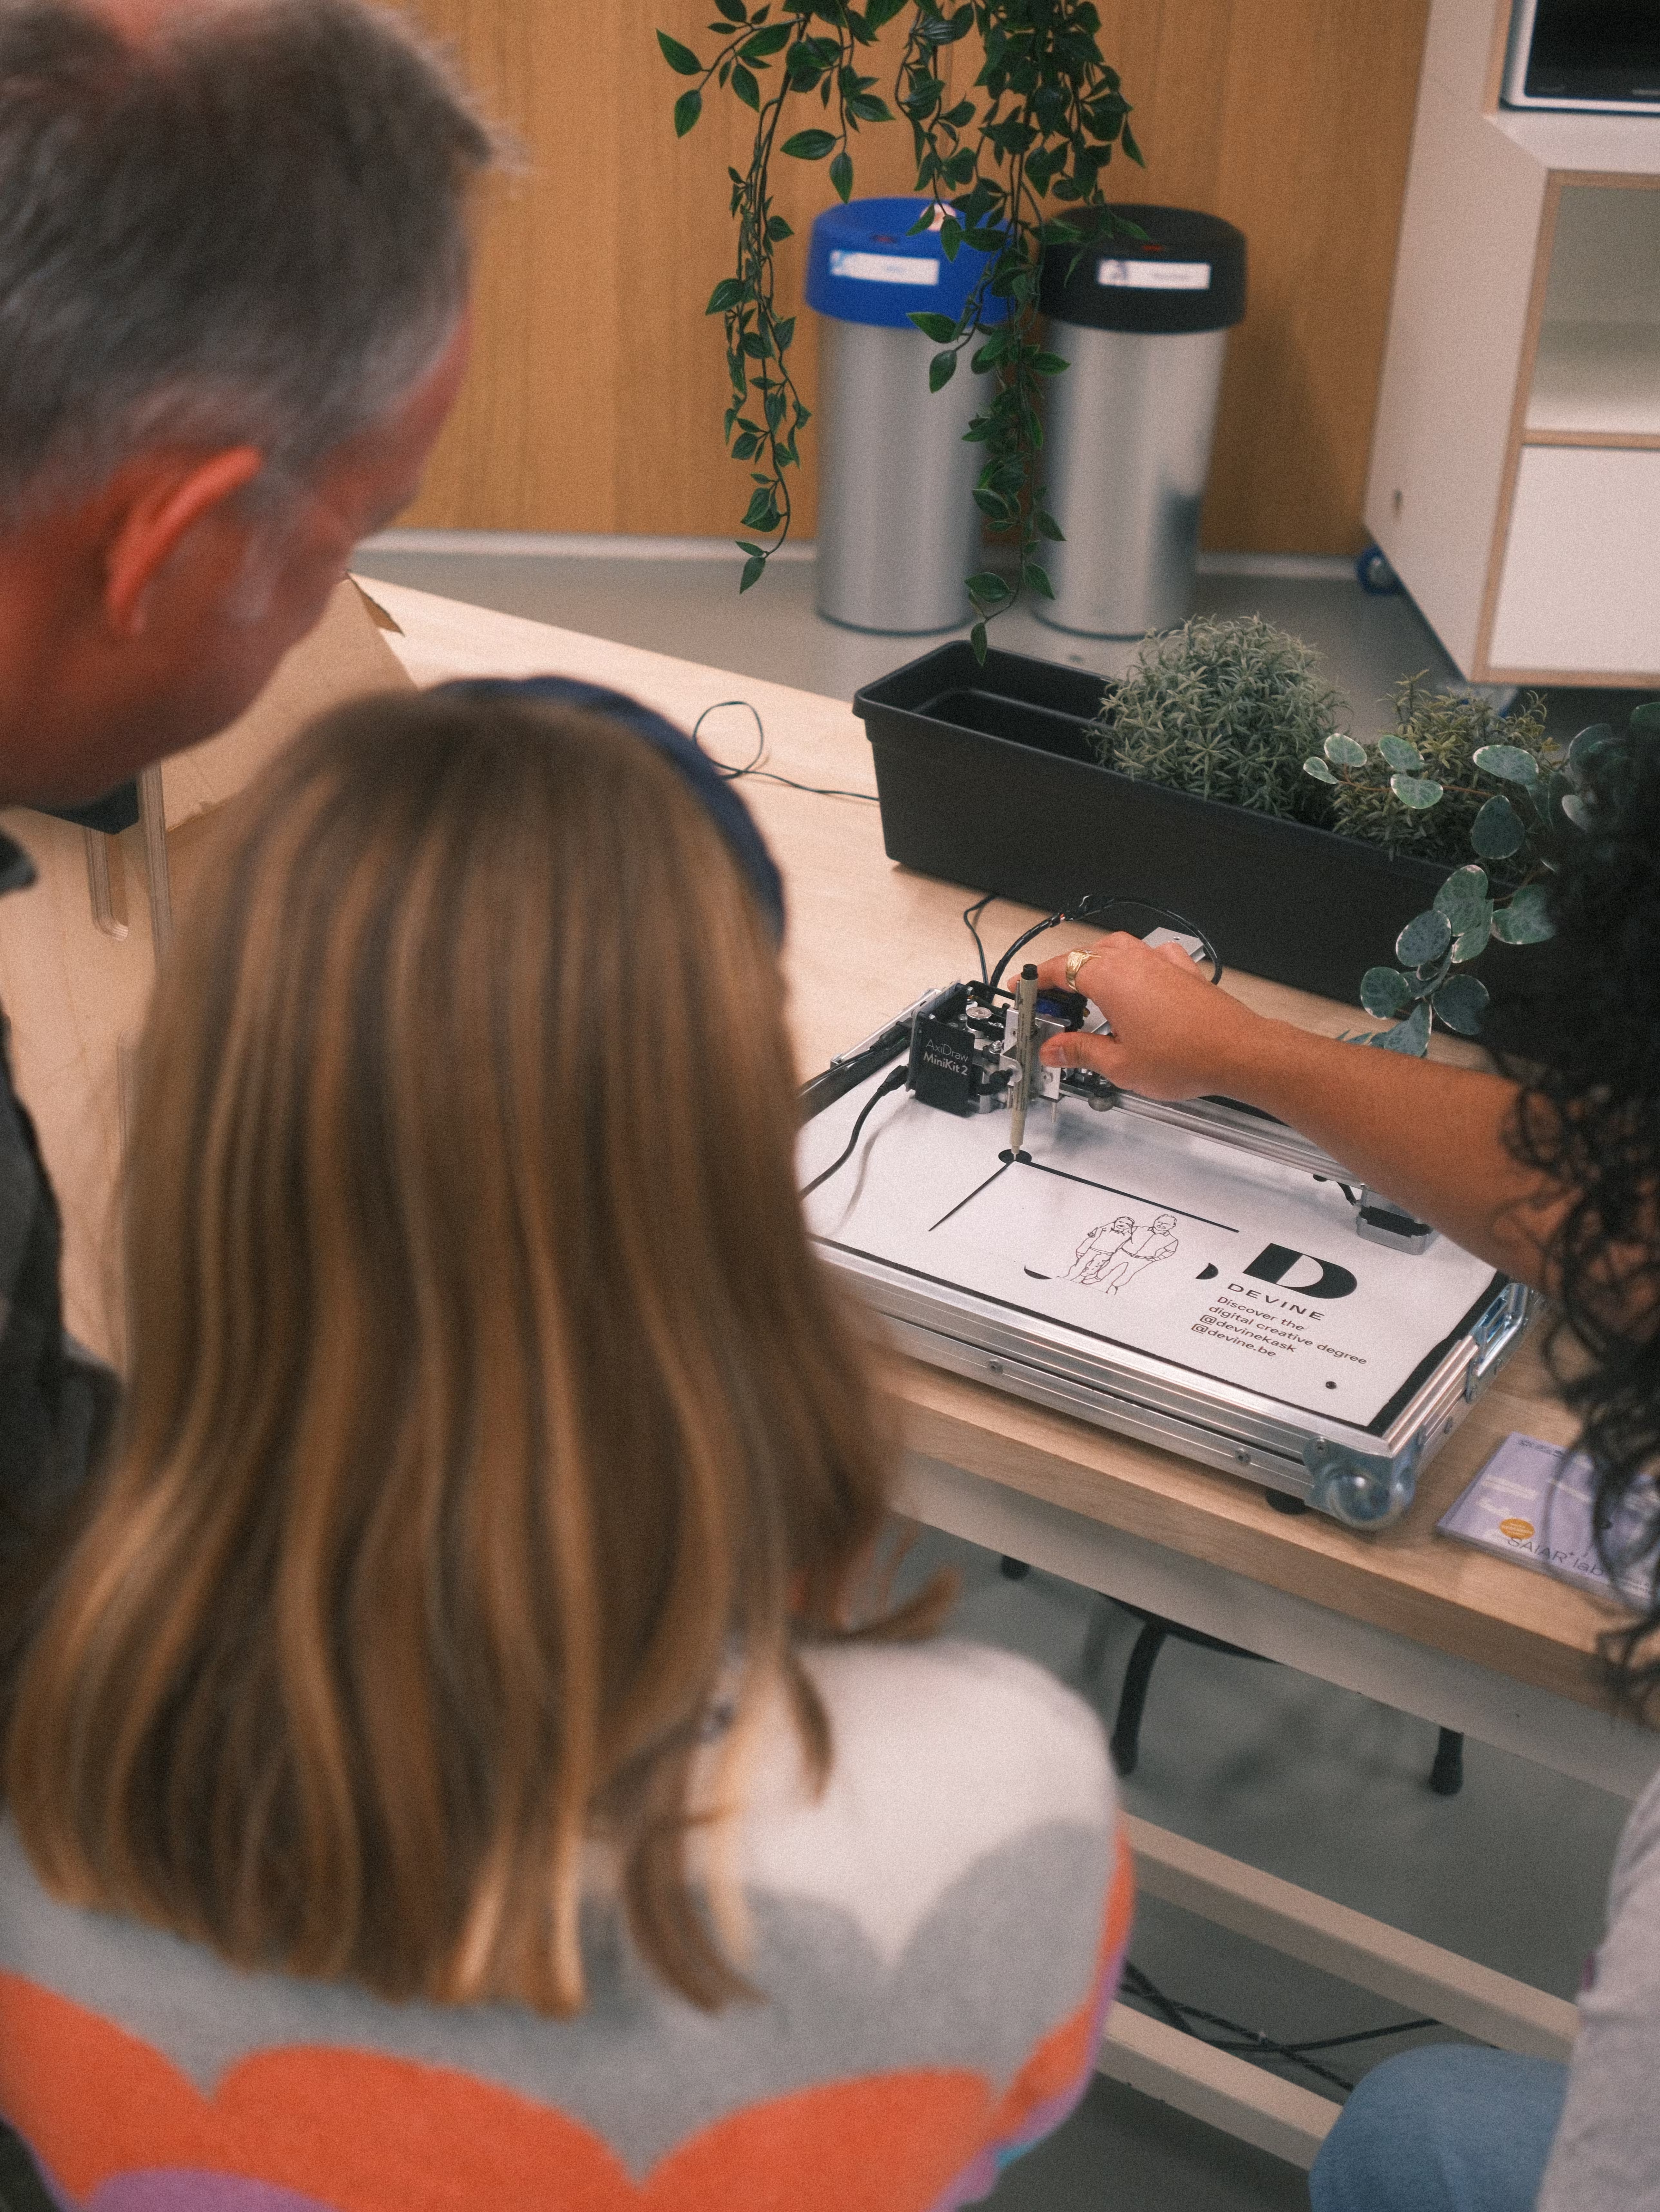
We ended up with an interactive experience that gave consistent results. Because of the local models, it did not rely on an active internet connection, and worked stable for hours on end.
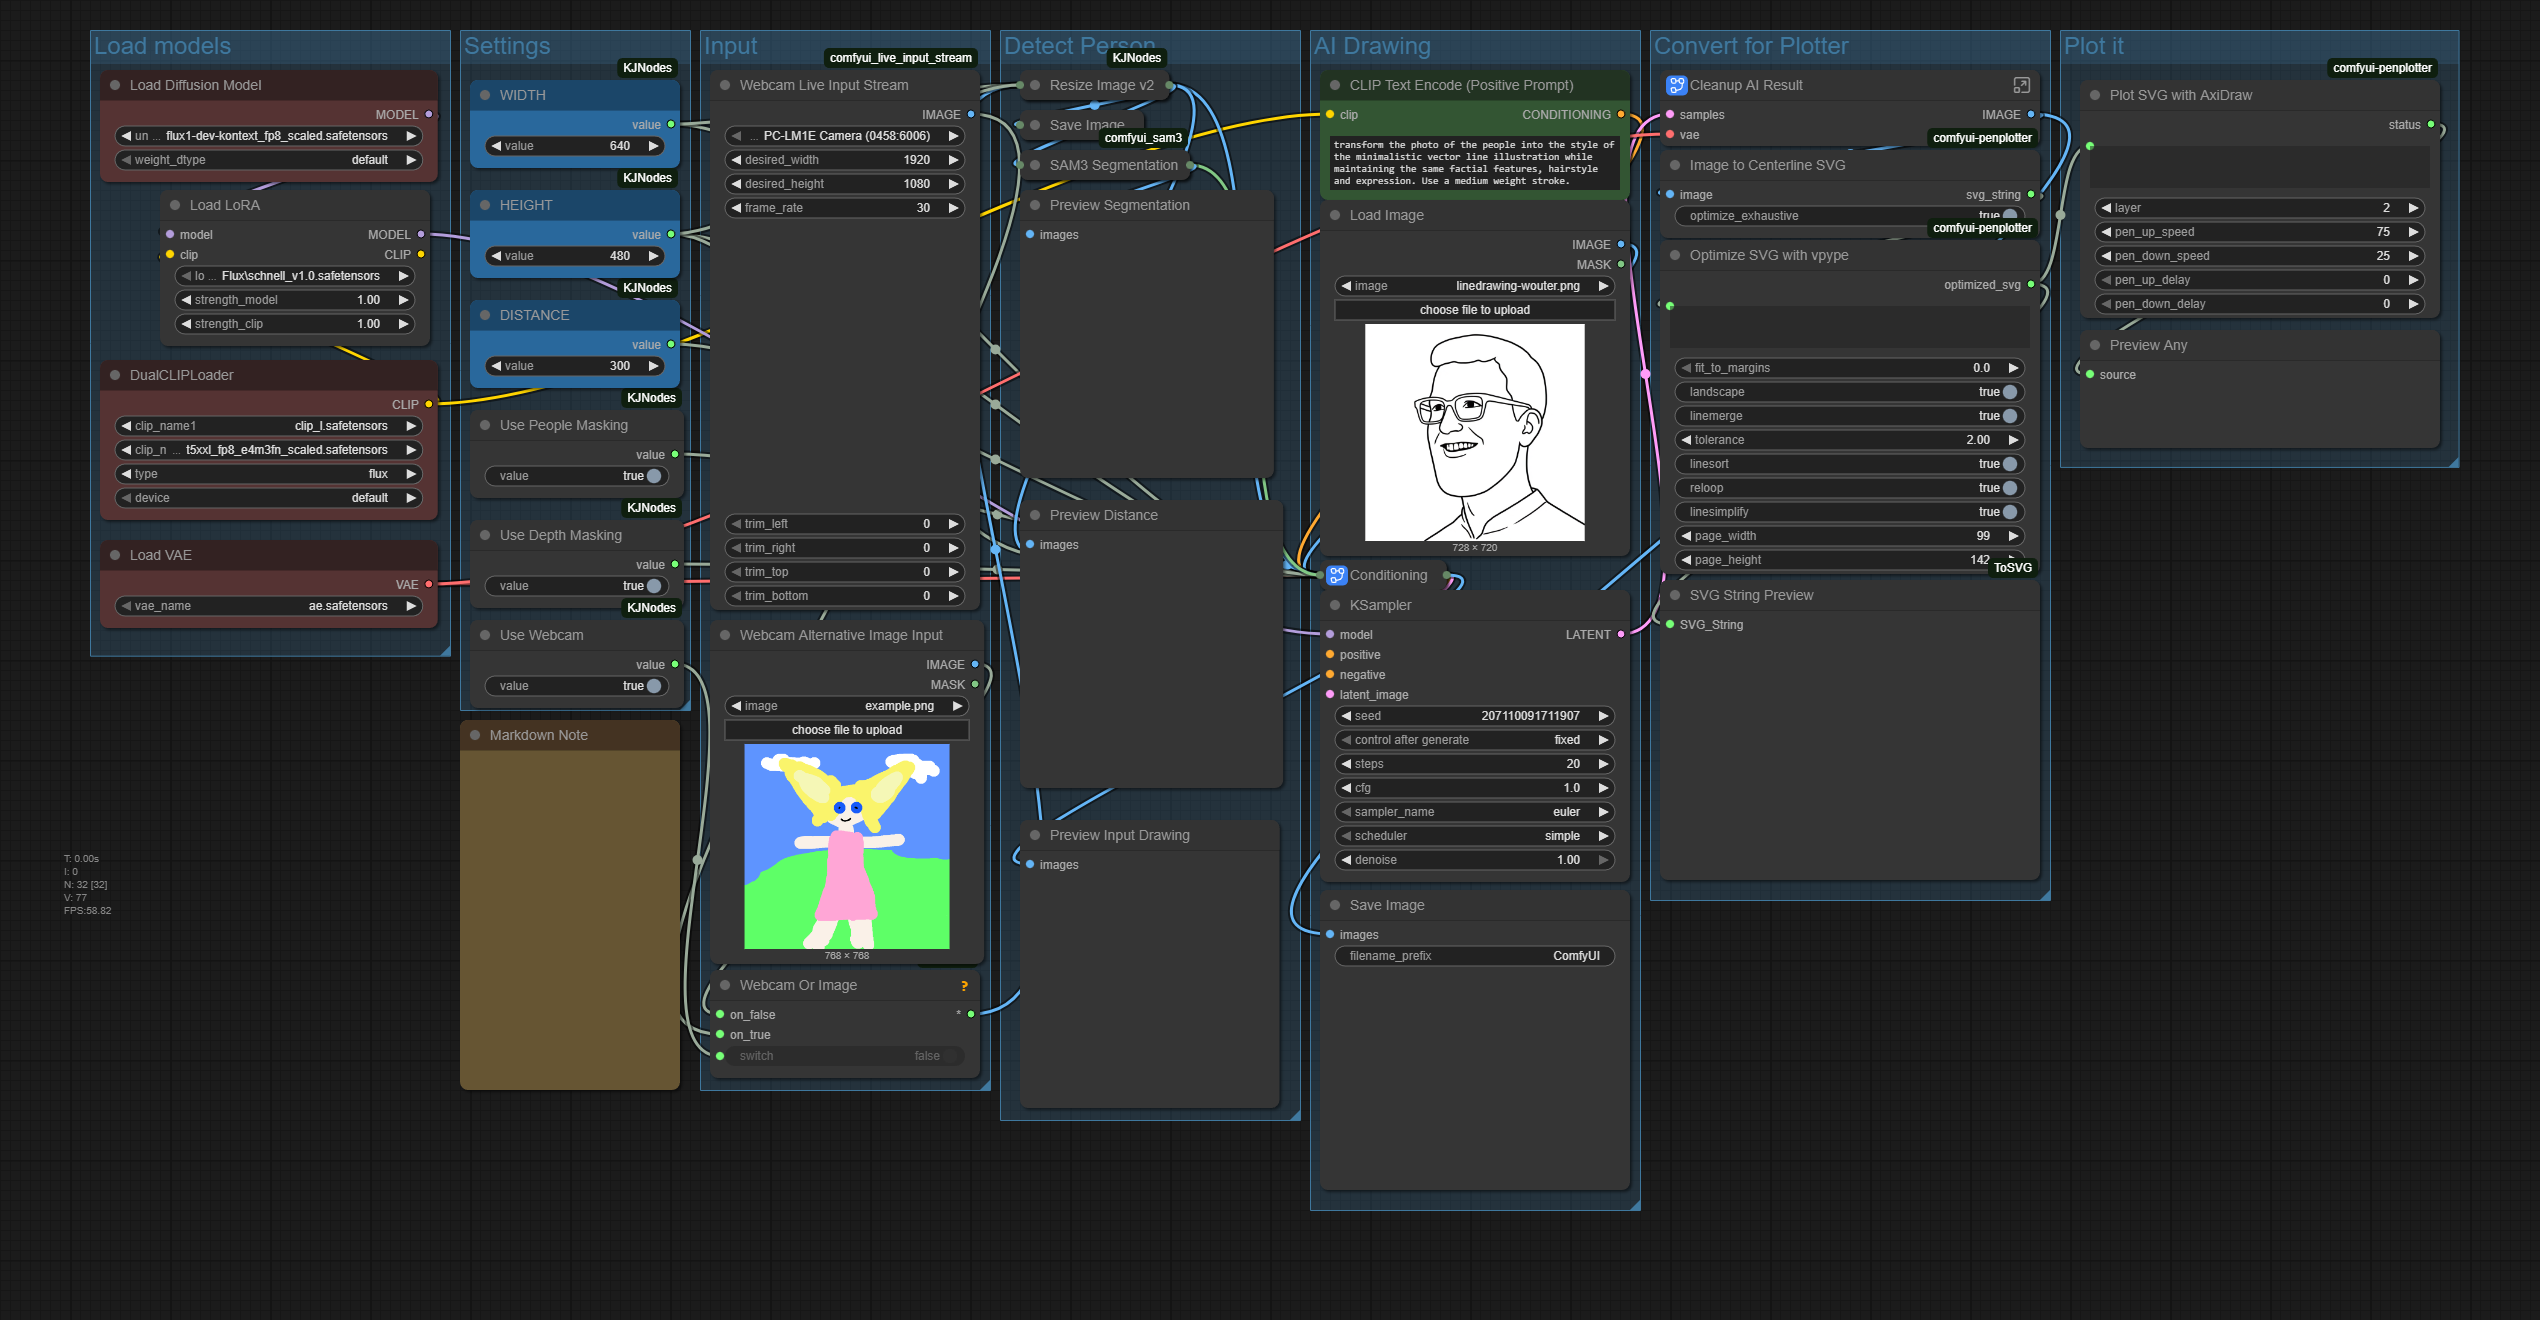
Thanks to the open source nature and custom node architecture of ComfyUI, we were able to fill in missing pieces ourselves, allowing for a single front-end experience for all phases of the project: taking the picture, removing the background, creating the drawing, vectorizing it and sending it over to the pen plotter all happens in one interface, with a single click on a Run-button.
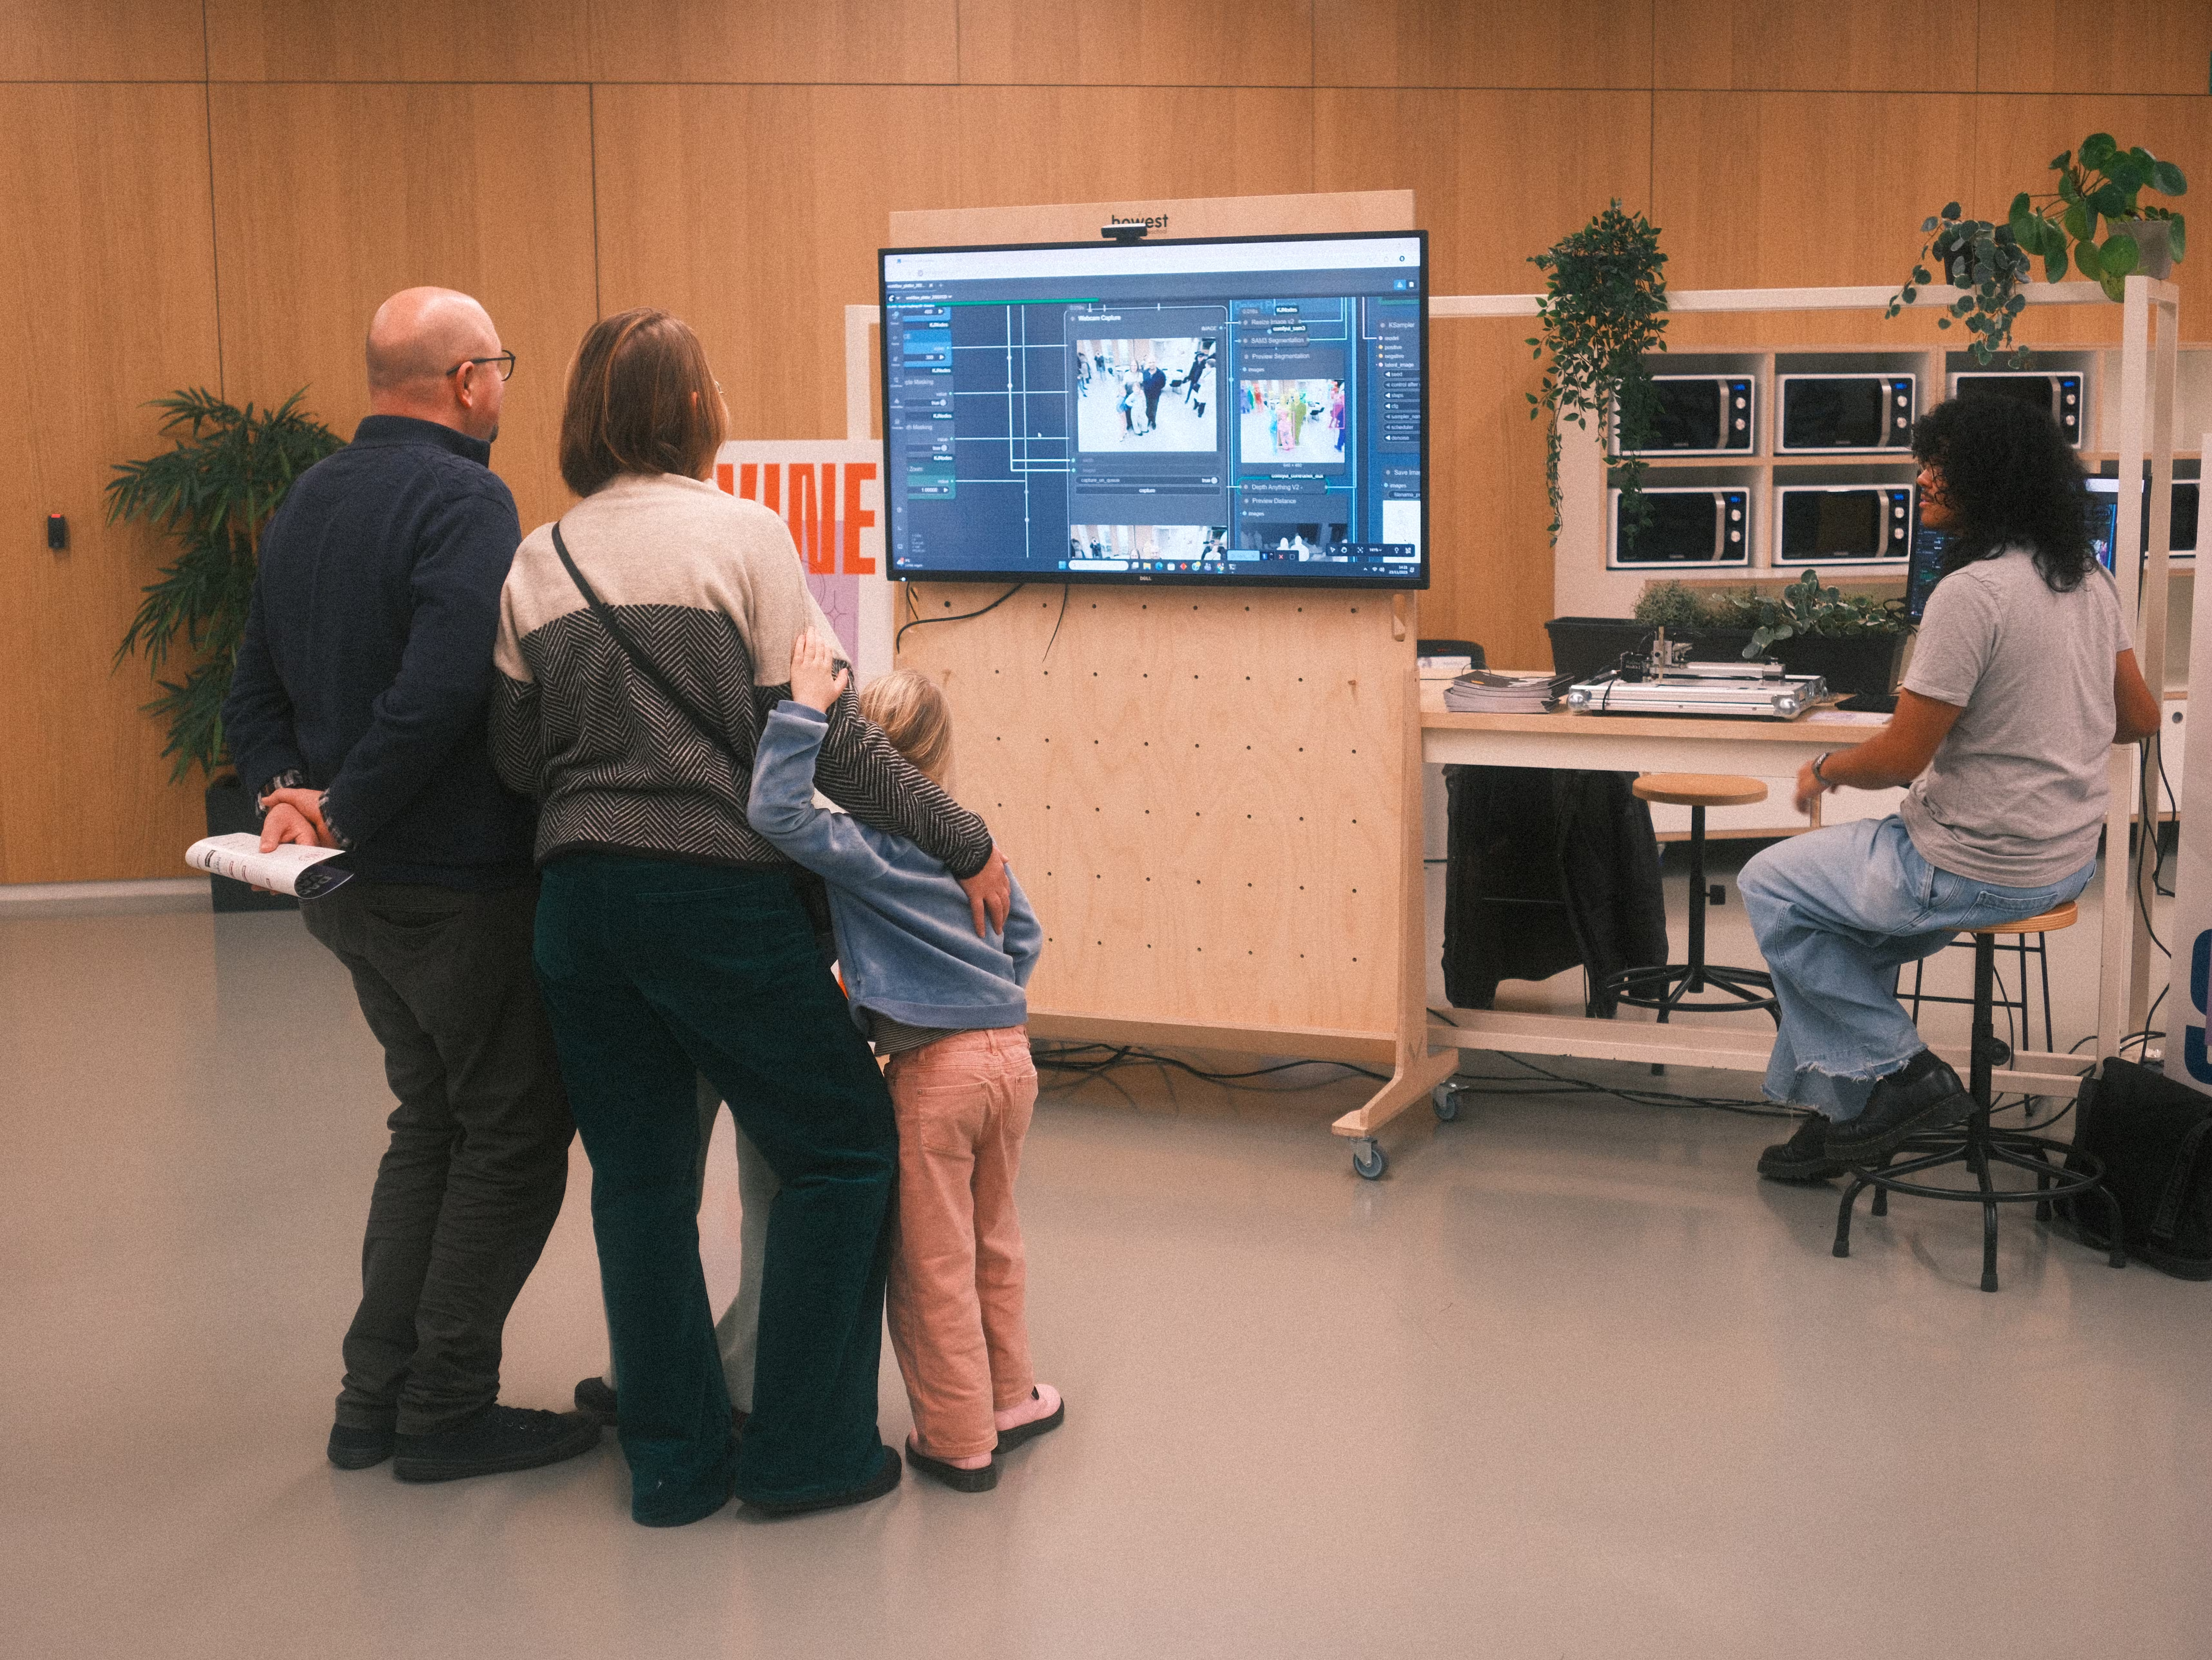
The final installation installed at KIKK 2025 and Dag van de Wetenschap at Howest was very much appreciated. The postcards, with our information of the department as well as our research, was distributed to a wide audience - resonating with people who were interested in the technological flows to people fascinated with the outcomes.
Custom nodes
You can find our custom nodes at the following locations:
Workflow